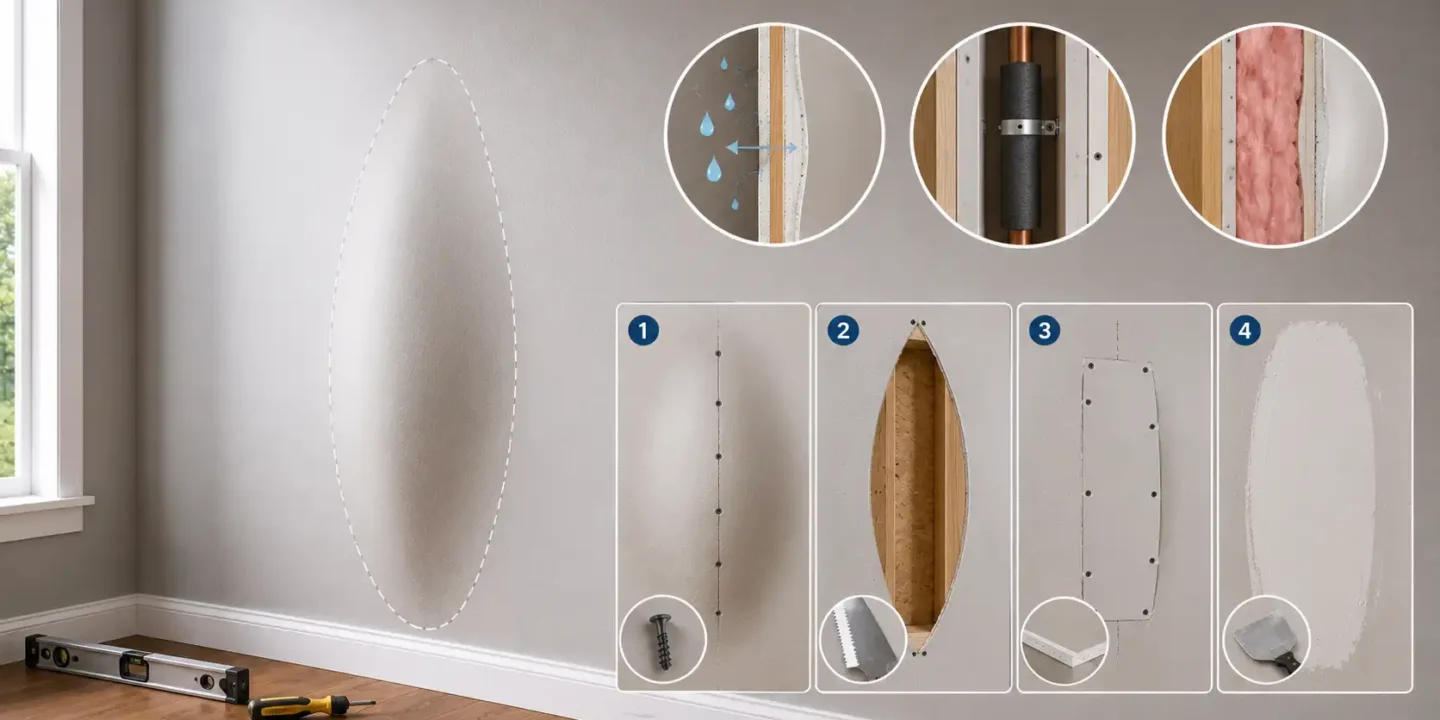



Drywall that’s pushing outward from the wall plane is one of those defects that’s easy to notice but harder to read. It might be a bubble of loose joint compound tape that lifted during the original finish work. It might be moisture damage that’s been quietly softening the panel for weeks. It could be drywall that was never properly fastened to the framing, or a bowed stud behind the wall pushing the panel forward. In a small number of cases, it points to something structural.
The visual presentation of a bulge doesn’t tell you which of those is true. Getting that answer right matters more than getting to the repair quickly. A tape bubble is a cosmetic fix. Moisture damage is a different situation entirely, with mold risk and a mandatory first step of fixing the water source before touching the surface. What looks similar from across the room can require a completely different response.
This article covers the main causes of drywall bulging, how to assess what you’re actually dealing with, when to treat it as urgent, and how to repair it correctly based on the underlying cause. Most bulging drywall is fixable. Some of it requires addressing the root problem first, or the repair won’t hold.
Key Takeaways
- The single most useful diagnostic test is pressing on the bulge. Soft or spongy means moisture damage. Firm means a mechanical or finishing issue.
- Ceiling bulges that feel soft or show visible sag are a falling hazard and should be treated as urgent.
- Moisture-damaged drywall must be cut out and replaced, not skimmed or re-taped over.
- The moisture source must be confirmed fixed before any repair work starts.
- Tape bubbles, fastener failures, and bowed framing each require a different repair approach. Treating them the same way is why bulging drywall comes back.
What Bulging Drywall Actually Looks Like
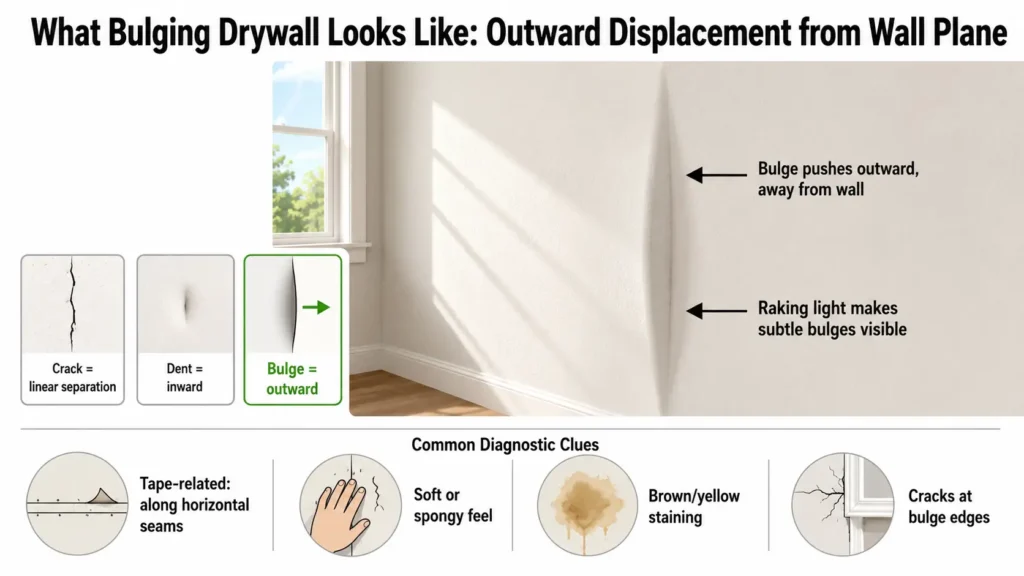
Bulging drywall is a visible outward displacement from the wall or ceiling plane. The range is wide. Some bulges are subtle, only obvious when light rakes across the surface at a low angle. Others are pronounced enough to be visible from the middle of the room.
It’s worth distinguishing from similar defects. A crack is a linear separation in the surface. A dent or hole is an inward deformation. A bulge pushes outward, away from the wall.
Where it shows up tends to vary by cause. Tape-related bulges typically appear along horizontal seams, where the tape has separated from the drywall face and pushed the compound layer forward. Fastener failures create a more generalized bow in the field of the sheet. Moisture-related bulging can occur anywhere there’s been water exposure, but it’s particularly common on ceilings, where gravity accelerates the deformation. Heavy compound buildup at corners can also create a bulge that looks structural but is purely a finishing problem.
Accompanying signs are useful diagnostic clues. Visible tape edges lifting away from the surface, a soft or spongy feel when you press on the affected area, brown or yellow staining around the bulge, and cracking at the edges of the deformed area all point toward specific causes. Each one narrows the diagnosis before you’ve touched a tool.
Common Causes of Bulging Drywall
Moisture Damage
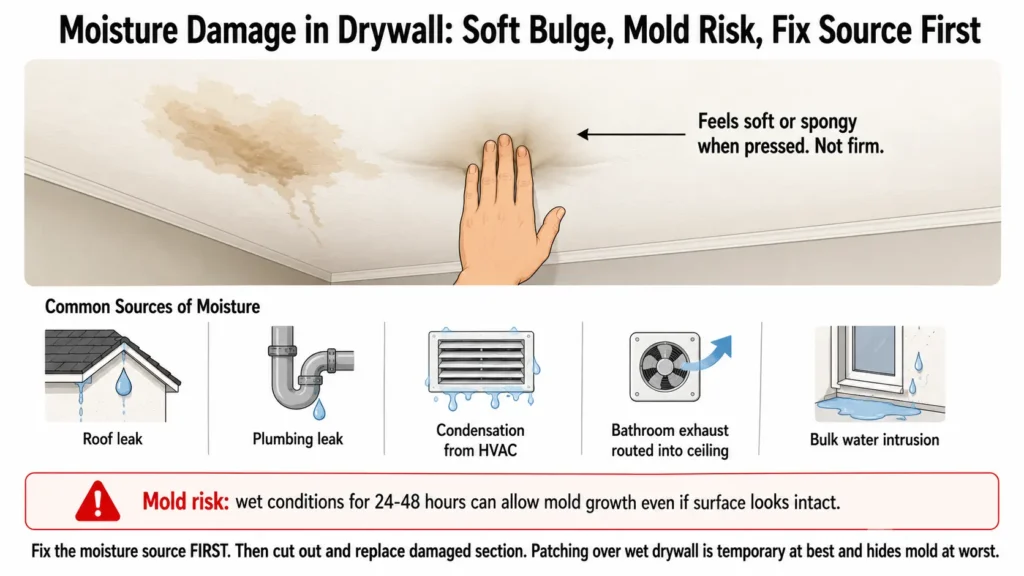
This is the most serious cause on this list and the most important to identify correctly. When drywall absorbs water, the gypsum core softens and loses its rigidity. Understanding acceptable drywall moisture levels helps determine whether repair or replacement is needed.
The paper facing can delaminate from the core. The panel deforms outward, and on ceilings, the weight of the compromised material accelerates that process considerably.
The sources vary: roof leaks, plumbing leaks behind the wall, condensation from HVAC ductwork, bathroom exhaust problems routing moisture into the ceiling cavity, and bulk water intrusion through the building envelope. The source matters because it has to be resolved before any repair is viable.
The most useful diagnostic test here is also the simplest. Press gently on the center of the bulge. Moisture-damaged drywall feels soft or spongy rather than firm. If it gives under light pressure, moisture damage is almost certainly the cause. A bulge that stays firm under pressure is unlikely to be moisture-related.
The mold risk is real and worth understanding clearly. Drywall paper is an effective growth medium for mold, and wet conditions behind a wall or ceiling don’t need to persist long before spores establish. If a moisture source has been active for more than 24 to 48 hours, mold growth within or behind the panel is a genuine possibility even when the surface still looks intact.
The repair approach for moisture damage is not negotiable on one point: the moisture source must be identified and fixed before any surface repair begins. Patching over wet or moisture-damaged drywall without addressing what caused it is a temporary fix at best and a hidden mold problem at worst. In most cases, the damaged section needs to be cut out and replaced rather than repaired in place.
Failed Fasteners
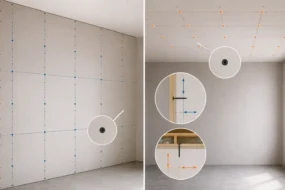
Drywall panels are held to framing with screws or nails. When fasteners fail, back out, or were never driven correctly, the panel loses its connection to the framing and can bow outward.
Nails are more prone to backing out over time than screws, which is why modern installation favors screws. In older homes where drywall was hung with nails, fastener backing is a common source of bulging that gets misdiagnosed as a tape or compound problem. A fastener that was overdriven during installation, breaking the paper face in the process, also provides minimal holding power and can allow the panel to shift.
Pressing on the bulge is again useful here. If the panel flexes and springs back, the framing is intact but the panel isn’t properly connected to it. Check nearby for nail pops or screw pops, which are a consistent signal that fastener failure is the issue.
The repair logic is straightforward: re-fasten the panel to the framing with screws before doing any surface work. Skimming or re-taping over a panel that isn’t attached to its framing will not produce a durable result.
Tape and Compound Issues
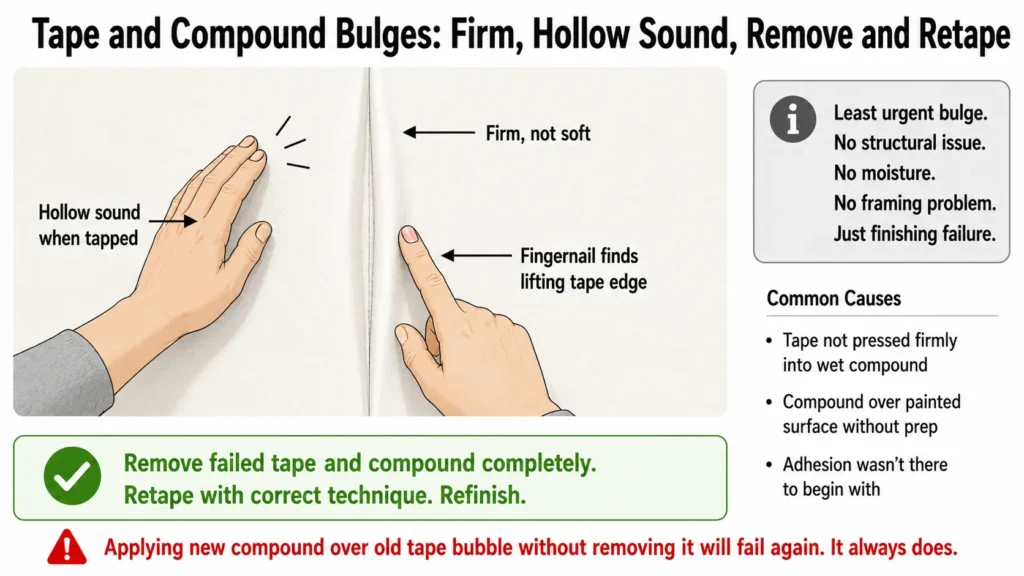
Improperly embedded tape, tape applied over a painted or contaminated surface, or compound built up too heavily can all produce drywall tape bubbles and seam bulges. This type of bulge is typically localized to the seam area and feels firm rather than soft.
Running a fingernail along the edge of the bulge usually reveals where the tape is lifting. Tapping on the surface produces a hollow sound where the separation has occurred. These are the least urgent bulges on this list. No structural issue, no moisture, no framing problem. It’s a finishing failure.
This happens most often in DIY work where tape wasn’t pressed firmly enough into the wet compound, or where compound was applied over a previously painted surface without proper preparation. The adhesion simply wasn’t there to begin with.
The repair requires removing the failed tape and compound completely, re-taping with correct technique, and refinishing. Applying new compound over an existing tape bubble without removing the old tape will reproduce the same failure. It always does.
Framing Issues and Wall Movement
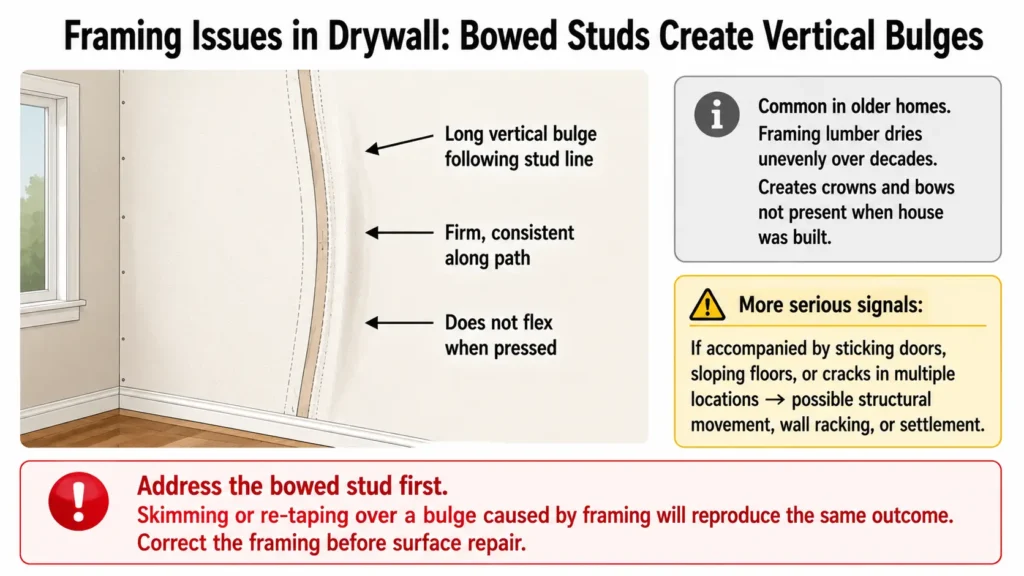
Bowed or twisted studs behind the drywall can push the panel outward at specific points. This is common in older homes where framing lumber has dried unevenly over decades, creating crowns and bows that weren’t there when the house was first built.
A single stud that’s bowed outward more than the surrounding framing will push the drywall forward at that location, creating a long vertical bulge that follows the stud line. This type of bulge is firm, consistent along a vertical or horizontal path, and doesn’t respond to pressure the way a delaminated tape joint or a moisture-compromised panel would.
In more serious cases, structural movement, wall racking, or settlement can cause larger sections of the wall plane to deform. This is less common but worth recognizing when other signs are present, such as sticking doors, sloping floors, or cracks appearing in multiple locations throughout the structure.
Addressing a bowed stud bulge without addressing the stud itself will reproduce the same outcome. The framing has to be corrected first.
Thermal and Humidity Expansion
Drywall expands in high humidity and contracts in dry conditions. In spaces with significant humidity swings, particularly basements, bathrooms without adequate ventilation, and unconditioned spaces like garages, panels that were installed without adequate expansion gaps can buckle slightly when they have nowhere to go.
This is less common than the other causes but worth recognizing. It typically presents as a shallow, widespread bow across a large section rather than a localized protrusion. Improving ventilation and controlling the humidity source in the space is the starting point. Without that, replacement panels will experience the same issue.
Impact or Physical Damage
A significant impact can deform drywall outward rather than inward if the panel flexes against a rigid backing. This shows up occasionally in garages, utility spaces, or areas where heavy objects have been moved against walls. It’s usually obvious from context. The homeowner generally knows something happened.
Repair involves patching or replacing the damaged section depending on how extensive the deformation is.
Assessing the Severity
Is It Soft or Firm?
This is the most important diagnostic question, and it takes about two seconds to answer. Press gently on the center of the bulge.
A firm bulge means the panel is still structurally intact. The cause is likely mechanical: a tape failure, a fastener problem, or a framing irregularity. Not urgent from a safety standpoint.
A soft or spongy bulge means moisture damage is almost certain. The panel has lost structural integrity. On a ceiling, this is a potential falling hazard. Treat it as urgent.
If the material crumbles or disintegrates when pressed, the damage is severe. Do not delay. That section needs to come out.
Where Is It?
Wall bulges are generally lower urgency than ceiling bulges, unless they’re large or accompanied by soft spots.
Ceiling bulges are a different category. Drywall is working against gravity from the moment it’s installed, and a panel section that has softened from moisture or lost its fastener attachment can fall without warning. Any ceiling bulge that’s soft, discolored, or shows any visible sag may ultimately require drywall ceiling replacement.
Location also helps narrow the moisture source. Bulging above a bathroom or kitchen points toward plumbing or fixture leaks. An exterior wall bulge points toward moisture intrusion from outside. Check the cladding, flashing, and window or door seals at the same location before opening the wall.
Is It Growing?
A bulge that appeared once and hasn’t changed is lower concern than one that’s visibly getting worse. If the bulge is growing, the underlying cause is active. No surface repair should happen until that cause is identified and resolved.
An easy way to track it: mark the boundary of the bulge with pencil lines and photograph it. Check again in a week. Growth confirms an active problem.
Is There Staining or Odor?
Brown or yellow staining at or around a bulge is a strong indicator of moisture damage. A musty odor near the affected wall or ceiling is a strong indicator of mold growth behind the surface, even when the drywall still looks visually intact.
Both signals are enough to treat the situation as moisture-related until proven otherwise, regardless of how firm the surface feels. Mold behind drywall doesn’t always soften the face paper quickly.
When to Call a Professional
Call a professional before attempting any repair if:
- The bulge is on a ceiling and feels soft or shows any visible sag below the surrounding plane
- There is staining accompanied by a musty odor suggesting active mold growth
- The bulge is large, covering more than a few square feet
- The bulge is on an exterior wall and is accompanied by signs of water intrusion or exterior damage
- The underlying cause isn’t identifiable
- The same area has been repaired before and the bulge has returned
- There are other signs of structural movement in the space: sticking doors, sloping floors, or cracks appearing in multiple locations
For moisture-related bulging, a water damage restoration professional can assess the extent of moisture penetration and evaluate mold risk before the repair scope is set. Doing that before any demolition helps avoid surprises once the wall is open.
For framing-related bulging, a carpenter or contractor with framing experience should assess whether sistering, trimming, or re-framing is the appropriate fix. This is not a judgment call most homeowners are positioned to make accurately from the surface.
How to Repair Bulging Drywall
Tools and Materials
- Utility knife and drywall saw
- Drywall screws (1-5/8 inch for walls, 1-5/8 to 2 inch for ceilings)
- Screw gun or drill with clutch
- Joint compound (all-purpose for finish coats, setting-type compound for base fills)
- Paper tape
- 6-inch and 10-inch drywall knives
- Sanding sponge or 120 to 150-grit sandpaper
- Drywall primer
- Replacement drywall panel (if the damaged section needs to be cut out)
- Moisture meter (useful for confirming moisture content is acceptable before closing up the wall)
Repairing a Tape and Compound Bubble
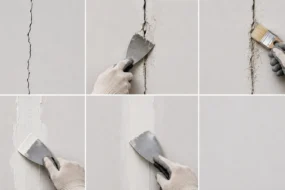
Step 1: Score along both sides of the lifted tape with a utility knife. Remove all tape and compound that has separated from the drywall face. Do not attempt to skim over it.
Step 2: Clean the surface. If the original tape was applied over paint, lightly sand the area to improve adhesion for the new compound layer.
Step 3: Apply a fresh thin coat of all-purpose compound to the seam. Embed new paper tape immediately, pressing firmly with the knife to work out any air pockets under the tape.
Step 4: Apply two finish coats, feathering wider than the tape on each pass. Allow full drying between coats.
Step 5: Sand smooth, prime, and paint.
The most common mistake here is applying new compound directly over the old bubble without removing the tape underneath. The repair will fail in the same way within months.
Repairing a Fastener Failure Bulge
Step 1: Locate the studs or joists behind the bulging section using a stud finder, or probe carefully with a thin nail.
Step 2: Drive new drywall screws through the panel into the framing, spacing them 8 to 12 inches apart according to proper drywall screw spacing practices. This pulls the panel back to the framing.
Step 3: Set any existing nail or screw pops by driving them slightly below the surface and adding a fresh screw nearby into solid framing.
Step 4: Once the panel is re-secured, skim the screw dimples with joint compound, feather lightly, sand, prime, and paint.
If the panel is also cracked from the movement, tape and finish those cracks as part of the same repair sequence.
A practical note on ceilings: re-fastening a panel that has moved significantly may not pull it fully back to the original plane. If there’s residual bow after re-fastening, a skim coat across the affected area can blend the transition.
Repairing Moisture-Damaged Drywall
Do not begin this repair until the moisture source is confirmed fixed. Use a moisture meter if one is available to verify the framing and surrounding material have returned to an acceptable moisture content. If a meter isn’t available, give the area adequate drying time after the source is repaired, and be conservative about it.
Step 1: Cut out the damaged section back to the nearest studs or joists on each side using a drywall saw. Remove all material that is soft, stained, or shows any visible mold growth.
Step 2: Inspect the framing and cavity behind the removed section. If mold is present on framing members, it needs to be treated before the wall is closed. If the affected area is larger than roughly 10 square feet, consult a remediation professional before proceeding.
Step 3: Allow the cavity to dry fully. A fan and dehumidifier running in the space will accelerate this.
Step 4: Install backing boards at the cut edges if needed to support the new panel edges.
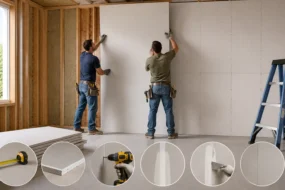
Step 5: Cut and install a replacement drywall panel, fastening properly to all framing.
Step 6: Tape, finish, prime, and paint.
One thing worth considering at this stage: if the location experienced moisture intrusion once, standard gypsum board may not be the best replacement product. If the moisture risk is ongoing or the location is inherently wet, moisture-resistant drywall is a better long-term choice. “For bathrooms and similar spaces, moisture-resistant drywall or cement board is worth the modest additional cost.
Addressing a Bowed Stud Bulge
This is the most involved repair on this list and the one most likely to benefit from professional help.
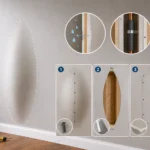
Option 1: Sister a straight stud alongside the bowed one. Attach the new stud to the top and bottom plates and tie it to the bowed stud. This gives the drywall straight framing to attach to without requiring removal of the original stud.
Option 2: Trim or plane the high point of the bowed stud to bring it into the same plane as the surrounding framing. This is only practical when the bow is minor and the stud is accessible.
Option 3: Fur out the surrounding studs to bring the wall plane out beyond the high point of the bowed stud, then re-drywall. This approach loses some wall depth but avoids the framing work entirely.
After the framing issue is resolved, replace the drywall section, tape and finish the seams, prime, and paint.
Preventing Bulging Drywall in New Work
Use screws, not nails. Screws hold reliably over time and are far less prone to backing out as framing lumber seasons. This is the single most effective change in modern drywall installation practice.
Check framing before hanging. Run a 6-foot level along the stud faces before the board goes up. High points that need planing or sistering are much easier to address before the drywall is installed than after.
Install with proper expansion gaps at floors and ceilings. Panels that are too tight against the framing have no room for dimensional movement and are more prone to buckling under humid conditions.
Embed tape properly. Press paper tape firmly into wet compound and work out all air bubbles before the first coat sets. Tape applied over dry compound or over a painted surface will not bond reliably.
Apply compound in thin coats. Thick single-pass applications shrink more, bond less uniformly, and are more prone to separating from the substrate. Multiple thin coats produce a more stable finished surface.
Prime before painting. Unprimed joint compound absorbs paint unevenly, and the surface tension during paint drying can contribute to tape lifting. Drywall primer is not optional if you want the finish to hold. For more on how finish quality affects these outcomes, the drywall finish levels guide has the detail.
Confirm moisture sources are resolved before closing walls. Any known plumbing, roof, or building envelope issue should be verified fixed before drywalling over it. Opening a freshly finished wall because the leak wasn’t fully addressed is an avoidable problem.
FAQ
Q: What causes drywall to bulge?
The most common causes are moisture damage softening the gypsum core, failed fasteners allowing the panel to separate from the framing, tape and compound that wasn’t properly embedded lifting away from the surface, and bowed framing pushing the panel outward. Moisture-related bulging is the most serious and the most urgent to identify correctly.
Q: Is bulging drywall dangerous?
It depends on what’s causing it and where it’s located. A soft or spongy ceiling bulge is a potential falling hazard and should be treated as urgent. Moisture-damaged drywall can also harbor mold behind the surface even when it’s not yet visible. Firm bulges from tape failure or minor fastener problems are not dangerous in the short term, but they should be repaired before they worsen. When there’s any uncertainty about a ceiling bulge, treat it as urgent until it’s assessed.
Q: Can you repair bulging drywall without replacing it?
Sometimes. Tape and compound bubbles and minor fastener failures can often be repaired without replacing the panel. Moisture-damaged sections almost always need to be cut out and replaced. The gypsum core has been compromised, and re-fastening or skimming over softened material is not a durable repair.
Q: How do I know if bulging drywall has mold behind it?
A musty odor near the affected area is the strongest indicator of mold growth behind the surface. Brown or yellow staining, a history of water intrusion at that location, and a soft or spongy feel are all supporting signals. The only way to confirm is to open the wall. If you suspect mold and the affected area is larger than about 10 square feet, consult a remediation professional before opening the wall yourself. See the EPA’s guidance on mold and moisture in buildings for more on when professional assessment is appropriate.
Q: Why does my drywall keep bulging after repair?
Because the underlying cause hasn’t been resolved. Tape bubbles that return mean the new tape wasn’t embedded correctly or was applied over a surface that won’t bond. Moisture-related bulges that return mean the water source is still active. Fastener-related bulges that return mean the panel isn’t being properly re-attached to the framing. Identifying the root cause before the next repair attempt is the step most repeat repairs skip.
Q: Should I be worried about a bulge on my ceiling?
More so than a wall bulge, yes. Ceiling drywall is working against gravity, and a section that has softened from moisture or lost its fastener attachment can fall without warning. Press gently on the bulge. If it feels soft, shows staining, or has any visible sag below the surrounding ceiling plane, treat it as a priority repair rather than a cosmetic issue.
Conclusion
The cause of the bulge determines the urgency and the repair approach. That’s the core logic to hold onto throughout this process.
Soft means moisture. Fix the source before anything else. Cut out the damaged material and replace it properly. Soft drywall is not a candidate for surface repair.
Firm along a seam means tape failure. Remove the old tape completely, re-embed new tape correctly, and refinish. Skimming over the problem will produce the same result.
Firm along a stud line means a framing issue. Correct the framing before re-drywalling. The bulge will return if the underlying structure isn’t addressed.
Ceiling bulges that feel soft or show any visible sag are a falling hazard until repaired. Wall bulges with staining or odor should be treated as moisture-related until proven otherwise. In both cases, getting the diagnosis right is worth more than moving quickly to patch.


Elena Hart is the founder and lead writer of Better Home Pro. She writes about drywall, home repair, and practical DIY home improvement topics, focusing on clear, useful information that helps homeowners make better decisions. Her work combines firsthand experience, manufacturer documentation, industry resources, and careful research to create content that is accurate, practical, and easy to understand. Through Better Home Pro, Elena aims to simplify complex home improvement topics and provide guidance that is genuinely helpful to homeowners and DIYers.








No Comments