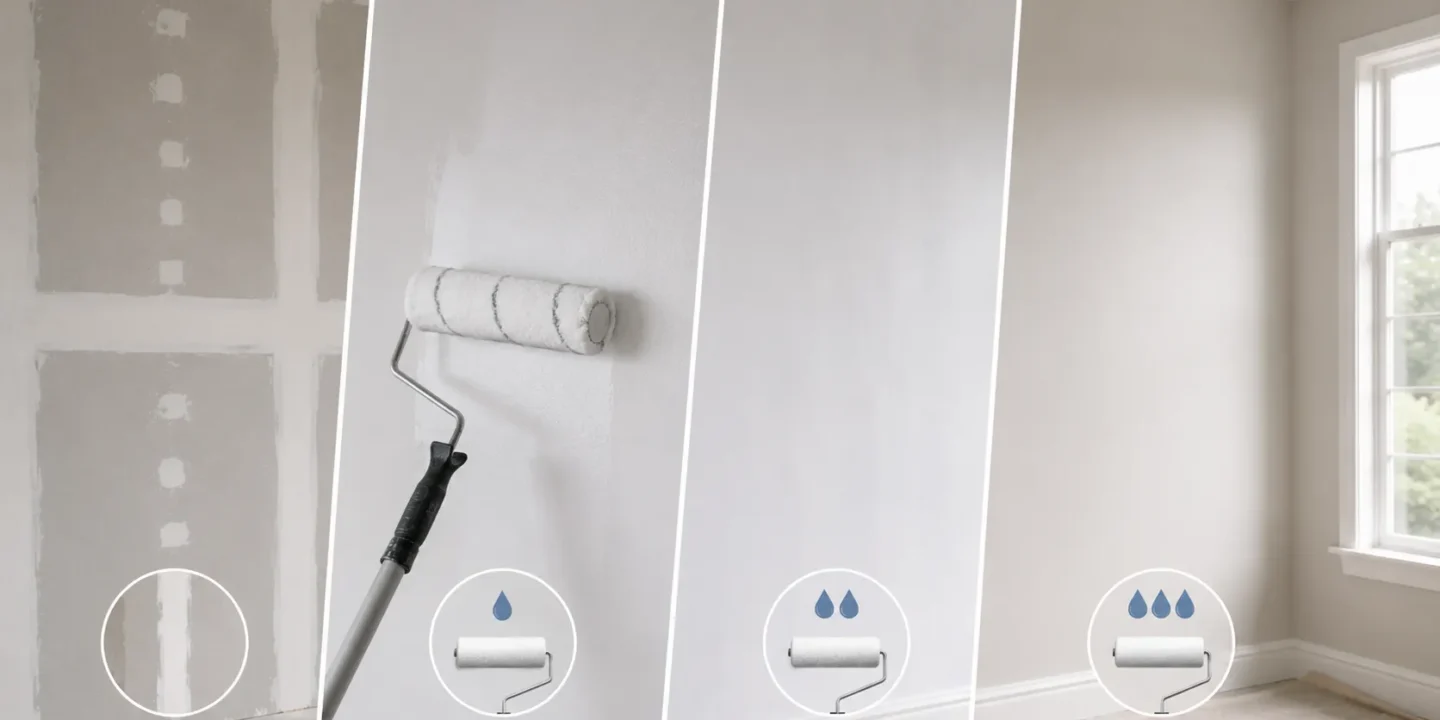

For most new drywall, two coats of primer is the safer, more reliable choice. One coat can work, but only under specific conditions: you are using a dedicated PVA drywall primer, the surface is smooth and properly finished, and there is no skim coat involved. If any of those conditions do not apply, plan for two coats.
That is the answer. The rest of this article explains the reasoning, covers the situations where the math changes, and walks through what goes wrong when the priming step gets rushed.
Key Takeaways
- Two Coats Safer: For most new drywall, two primer coats provide the most reliable seal and help prevent flashing.
- PVA Works Best: One coat may be enough only when using a dedicated PVA drywall primer on smooth, properly finished drywall.
- Skim Coat Exception: Skim-coated walls are highly absorbent and typically require at least two coats of primer.
- Higher Sheens Reveal More: Satin, semi-gloss, and gloss paints make primer inconsistencies far more visible than flat or eggshell finishes.
- Check Before Painting: Inspect primed walls under angled light; dull spots or uneven absorption signal the need for another coat
The Short Answer (and Why It Depends)
Here is how to think about it:
One coat is acceptable when:
- You are using a dedicated PVA drywall primer (not a standard latex or all-purpose primer)
- The drywall is smooth, fully finished, and has no skim coat
- The finish paint is flat or eggshell, which is more forgiving of minor surface variation
Two coats are recommended when:
- You are using a standard latex or all-purpose primer
- The surface has been skim coated
- You are finishing with satin, semi-gloss, or any higher-sheen paint
- There are large patched or mudded areas on the wall
The reason this is not a flat one-size answer comes down to how new drywall absorbs liquid. It does not absorb evenly, and that unevenness shows through the finished paint in a way that is difficult and expensive to fix after the fact.

Why New Drywall Absorbs Primer Differently
New drywall has two distinct surface types existing side by side. The flat paper face of the drywall board itself is relatively dense. The joint compound used to tape seams, fill screw holes, and feather edges is far more porous as recognized in ASTM C840 drywall finishing standards. When you roll primer over new drywall, these two surfaces pull moisture out of the primer at different rates.
The paper face absorbs slowly. The joint compound absorbs fast. The result is that primer dries at different rates across the same wall, and the sealed surface ends up inconsistent before you ever pick up a paint roller.
When paint goes over that inconsistent primer layer, some areas reflect light slightly differently than others. This is called flashing, a phenomenon addressed through proper surface preparation in ASTM C840 finishing requirements. It is most visible in raking light, like when sunlight hits the wall at an angle or when a lamp is positioned near the surface. It looks like the paint job is failing when the real problem happened one step earlier.
This does not happen on previously painted walls because the existing paint has already sealed and unified the surface, unlike surfaces with torn drywall paper that absorb coatings unevenly . New drywall has no such layer yet. Primer is what creates it, and one coat that absorbs unevenly into joint compound does not always do the job completely.
PVA Primer vs. Standard Latex Primer on New Drywall
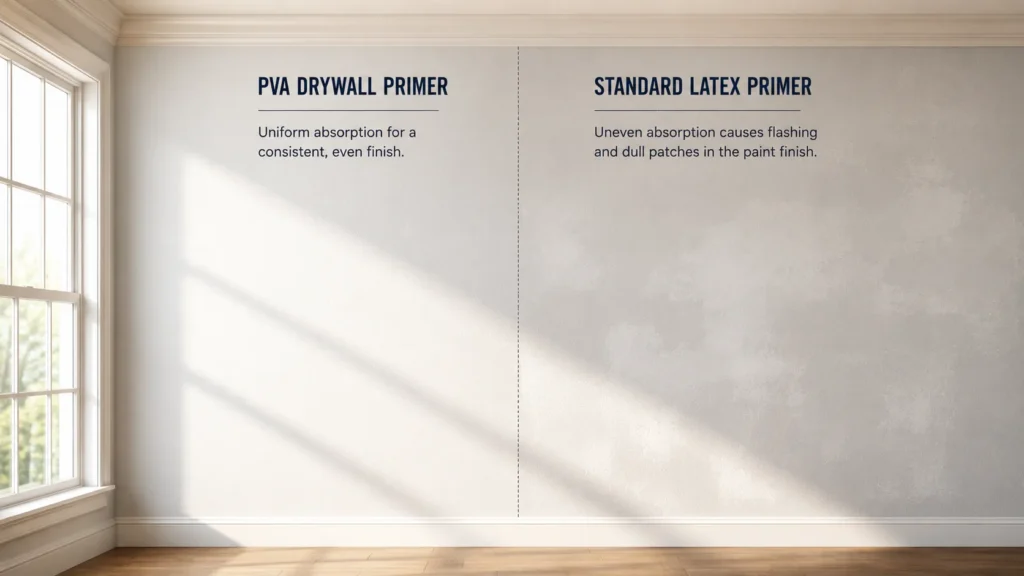
PVA stands for polyvinyl acetate. PVA drywall primer was developed specifically to address the absorption problem described above and is commonly used on gypsum board manufactured to ASTM C1396 gypsum board specifications. It is formulated to penetrate the surface quickly and form a consistent seal across both the drywall paper and the joint compound in a single coat. That uniform seal is what allows one coat to sometimes be enough.
Standard latex primer is not designed with this specific problem in mind. It works well on previously painted walls, on wood, on plaster, and on many other surfaces. On new drywall, it tends to absorb unevenly into the joint compound, which means the first coat often does not fully unify the surface. A second coat is usually necessary to build up enough of a sealed layer to prevent flashing.
All-purpose primers fall into the same category as standard latex for this purpose. The label says it works on everything, and it does, but “works on everything” is not the same as “optimized for new drywall.”

Paint-and-primer-in-one products deserve a direct answer here because they are heavily marketed and frequently misused. On new drywall specifically, they do not perform like a dedicated primer coat. The paint formulation is not designed to penetrate and seal raw drywall the way a standalone primer is. Using a paint-and-primer product on new drywall and skipping a primer coat almost always results in flashing and uneven absorption. Use a dedicated primer first, then the paint-and-primer product if you want. Do not skip the dedicated primer step and expect the paint-and-primer label to cover for it.
When You Definitely Need Two Coats
Skim coated surfaces. If the drywall has been skim coated, plan for two coats of primer regardless of primer type. Skim coat is applied joint compound spread thin across the entire wall surface. Joint compound is extremely absorbent, far more so than drywall paper. A skim coat creates a beautiful, smooth surface for painting, often associated with a Level 5 drywall finish, but it drinks primer. One coat rarely seals it fully. Two coats is the standard starting point, and in some cases a third may be needed on heavily absorbent skim coat.
Standard latex or all-purpose primer. As covered above, these products are not optimized for new drywall and typically require two coats to reach the same surface seal a single coat of PVA primer can achieve.
Higher-sheen finish paints. Flat paint is forgiving. It scatters light in multiple directions and masks minor surface inconsistencies reasonably well. Eggshell is slightly less forgiving. Satin, semi-gloss, and gloss finishes are significantly less forgiving because they reflect light more directly and reveal surface variation that flat paint would hide which is why the Gypsum Association Levels of Finish guidelines place greater emphasis on surface uniformity under critical lighting conditions . If the finish coat is anything shinier than eggshell, two coats of primer is not optional. It is necessary to get a surface uniform enough that the paint will look right.
Large mudded or patched areas. Anywhere joint compound covers a significant portion of the wall surface, whether from heavy taping, large repairs, or corner bead coverage, the absorption rate is higher. One coat of primer over these areas rarely seals completely.
Thin first coat. If the first coat was applied too quickly, too thin, or with a worn-out roller that did not distribute evenly, the coverage will be inconsistent regardless of primer type. A second coat is the correction, not a reflection of choosing the wrong product.
What Happens If You Skip a Coat
Flashing is the most common result, and it shows up after the finish coat goes on, not before. The wall looks painted. Then you turn on a lamp or the afternoon sun hits it, and you see dull patches scattered across the surface, similar to how certain drywall surface defects become visible under raking light.
Beyond flashing, under-primed new drywall can develop uneven sheen across the full surface, not just in patches. The paint does not fail structurally in most cases, but it does not look right, and the variance tends to become more noticeable over time rather than less.
Adhesion problems are less common with modern latex paints but are possible, particularly if primer was skipped entirely and paint was applied directly to raw drywall. Paint applied directly to raw drywall paper can pull away more easily over time because there is no sealed primer layer bonding the system together.
The repair path for flashing is either applying a coat of primer over the finish paint and repainting, or accepting the result. Neither option is cheaper than applying the second coat of primer before you ever picked up the paint roller.
Application Notes That Affect the Outcome
A few practical points that influence whether one coat does the job or falls short:
Roll primer, do not brush the full surface. A roller distributes primer more evenly across drywall than a brush. Brushed primer tends to leave thicker deposits in some areas and thinner in others. Use a brush only for cutting in at corners and edges, then roll the main surface.
Respect the dry time. Primer that is recoated before it has fully dried does not build up properly. Check the manufacturer’s specified dry time and follow it. In high humidity or cool temperatures, add time rather than assuming the label estimate applies to your conditions, especially when dealing with drywall moisture levels that slow drying.
Sand lightly between coats only if needed. If the first coat dried rough or raised the grain of the drywall paper, a light sand with 120 or 150 grit sandpaper before the second coat will level the surface. If the first coat dried smooth, skip the sanding step. You are not trying to remove the primer, just knock down any texture.
Check coverage in good light before deciding one coat is enough. Walk the surface with a handheld light held at an angle a quality-control technique commonly recommended in AWCI drywall finishing best practices. Dull patches, visible suction spots, or areas where the primer looks thinner are signs a second coat is needed. Do this before the paint goes on, not after.
Once the primer coats are on and the surface is uniform, the next decision is which paint sheen works best for the space. That is a separate question with its own set of tradeoffs, and it is worth thinking through before you open the first can.

Elena Hart is the founder and lead writer of Better Home Pro. She writes about drywall, home repair, and practical DIY home improvement topics, focusing on clear, useful information that helps homeowners make better decisions. Her work combines firsthand experience, manufacturer documentation, industry resources, and careful research to create content that is accurate, practical, and easy to understand. Through Better Home Pro, Elena aims to simplify complex home improvement topics and provide guidance that is genuinely helpful to homeowners and DIYers.


No Comments