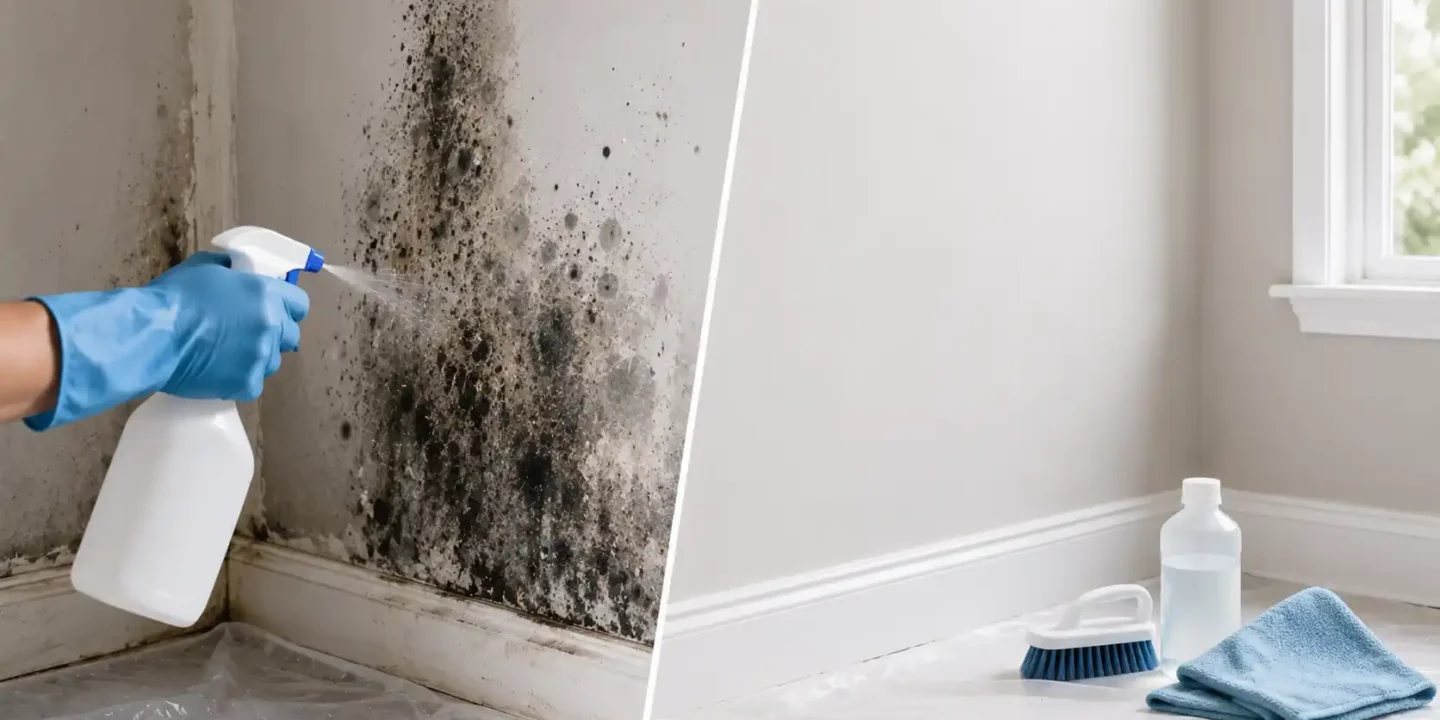



You noticed it on the wall behind your bathroom door, or along the baseboard in the basement, or fanning out from the corner near the window. Gray, black, or greenish patches that weren’t there a few months ago. Before you grab a spray bottle, there is one question that matters more than which product to buy: is this mold sitting on the surface of your drywall, or has it worked its way into the material itself?
That distinction determines whether you have a cleaning job or a replacement job. This article will help you figure out which situation you’re in, and then walk you through exactly how to clean it if cleaning is the right call.
Key Takeaways
- Assess Before Cleaning: Clean only firm, intact drywall; soft, spongy, or recurring mold damage requires replacement.
- Follow EPA Limits: DIY cleanup is appropriate only for affected areas under roughly 10 square feet.
- Use Proper Solutions: Hydrogen peroxide, borax, or Concrobium are generally better suited for drywall than heavy bleach applications.
- Drying Is Critical: Thorough drying and humidity control prevent mold from returning after cleaning.
- Fix Moisture Source: Leaks, condensation, or poor ventilation must be resolved or mold will come back.
First, Figure Out What You’re Actually Dealing With
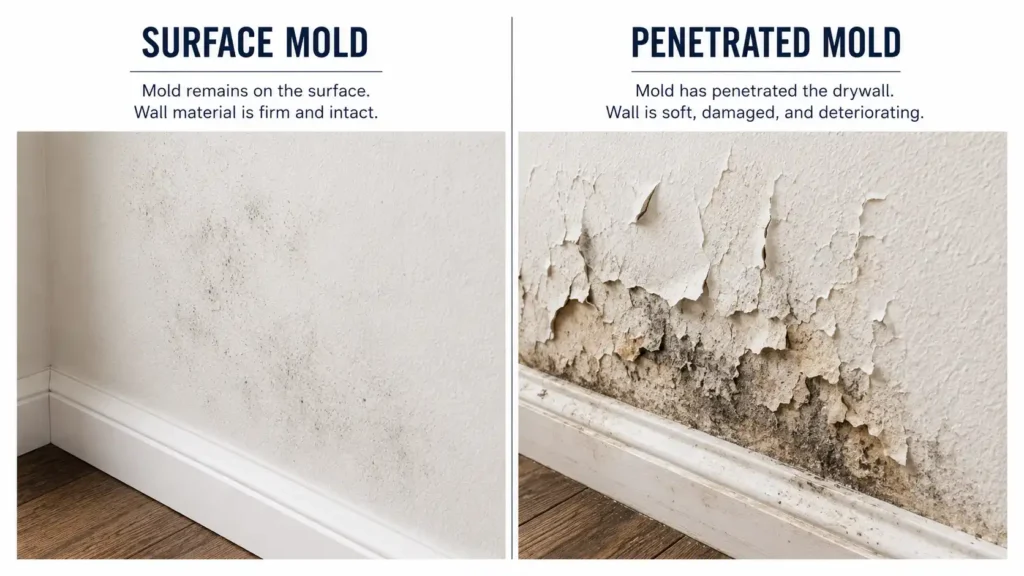
Drywall is porous. That single fact changes everything about how mold treatment works on this surface compared to tile, concrete, or painted wood. When mold grows on tile grout, it sits on top of the surface. On drywall, it can do the same thing initially, but if moisture exposure continues long enough, the mold begins to penetrate the paper facing and eventually works into the gypsum core. Once that happens, cleaning the surface is essentially cosmetic. The mold is still there.
Surface mold typically looks like a flat discoloration, usually dark gray, black, or greenish. The wall surface feels firm and intact when you press it. The paint may be slightly discolored but not bubbling, flaking, or soft. This type is cleanable.
Penetrated mold is harder to spot just by looking. The wall might appear similar, but when you press the area, the drywall feels soft, spongy, or gives more than it should. You might notice the paper facing starting to delaminate, similar to damage seen with torn drywall paper. Paint may be bubbling or peeling. In some cases there is a musty smell that persists even after surface cleaning. This is not cleanable. The drywall needs to come out.
A few honest criteria for deciding right now:
- If the affected area is larger than roughly 10 square feet, stop and get professional assessment. The EPA mold remediation guidelines use this as the general threshold for DIY remediation
- If the drywall feels soft, sounds hollow where it didn’t before, or shows any structural damage, replacement is the answer, which may require a complete drywall installation process.
- If the mold has come back more than once after cleaning, the moisture source behind the wall is almost certainly still active. Cleaning the surface again will not solve it.
- If you suspect an active leak or condensation behind the wall, open the wall before deciding anything. Cleaning the face of wet drywall is pointless.
If your situation passes all of those checks and the drywall is firm and the affected area is manageable, you can move on.
What You’ll Need Before You Start
Get everything together before you open the cleaning solution. Once you start, you want to keep the area sealed and work through the process without leaving and coming back.
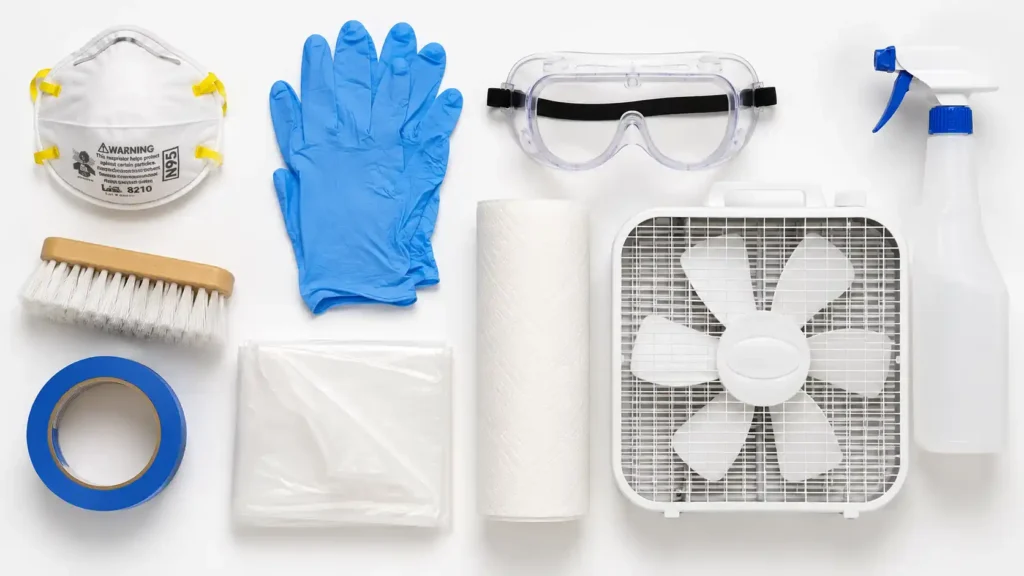
Protective gear:
- N95 respirator, following OSHA respiratory protection requirements, not a basic dust mask. Surgical masks and paper dust masks do not filter mold spores effectively. The N95 rating is what actually catches particles at the relevant size according to NIOSH guidance on N95 respirators. This matters particularly during scrubbing, when spores become airborne.
- Nitrile gloves
- Safety glasses or goggles
Containment:
- Plastic sheeting and painter’s tape to seal off doorways and HVAC vents in the room. Mold spores travel. Sealing the work area prevents them from spreading to other parts of the house.
Cleaning solution (pick one):
- Hydrogen peroxide (3% solution): effective on porous surfaces, does not leave a toxic residue, does not off-gas the way bleach does. Good first choice for drywall. Different types of drywall can also respond differently to prolonged moisture exposure.
- Borax solution (1 cup borax dissolved in 1 gallon of water): leaves a residue that inhibits future mold growth, which is useful. Requires a bit more scrubbing.
- Concrobium Mold Control: an encapsulant product that crushes mold as it dries rather than killing it with chemistry. Works well on drywall because it does not require heavy liquid application. More expensive than the others.
- Bleach solution (1 cup bleach per gallon of water): commonly recommended, but has a real limitation on drywall specifically. Bleach is mostly water, and the active compound does not penetrate porous surfaces well. It can kill surface mold effectively but may not reach mold that has started to move into the paper layer. It also risks over-saturating the drywall if applied heavily. Use it only on genuinely surface-level growth, apply sparingly, and do not assume it has reached everything it needs to reach.
Other supplies:
- Stiff-bristled brush (a scrub brush or old toothbrush for tight spots)
- Spray bottle
- Clean rags or paper towels
- Box fan or portable ventilation
How to Kill Mold on Drywall: Step by Step
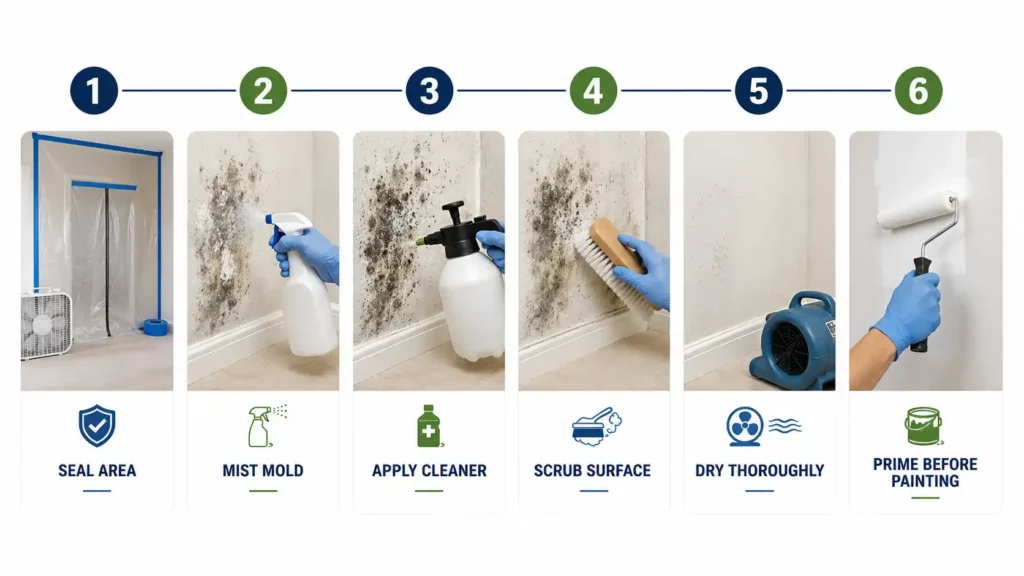
1. Seal off the area and set up ventilation
Hang plastic sheeting over doorways and tape it in place. Cover or seal any HVAC vents in the room so the system does not pull contaminated air through the ducts. Open a window and position a fan to exhaust air out of the room, not just circulate it. You want airflow moving from the room outward.
2. Mist the mold before you touch it
This step gets skipped in most articles, and it makes a real difference. Lightly mist the moldy area with plain water before doing anything else. Dry mold spores become airborne immediately when disturbed. Slightly dampening the surface before scrubbing reduces how many spores you send into the air. Do not soak the area. A light mist is enough.
3. Apply your cleaning solution and let it sit
Spray your chosen solution onto the affected area. The goal is coverage, not saturation. This is where many people make a mistake with drywall specifically: applying too much liquid. Drywall absorbs moisture, and soaking it during cleaning can push surface contaminants deeper into the material, and it sets up the wall for another mold problem because the drywall then stays damp for too long.
Apply enough to coat the surface visibly and let it dwell. Hydrogen peroxide needs about 10 minutes. Borax solution can work in 5 to 10 minutes. Concrobium is applied and left to dry without rinsing. Bleach solution works in about 10 minutes.
4. Scrub and wipe
Use your stiff-bristled brush to work the solution into the affected area. Wipe away the residue with a clean rag. If you are using borax or hydrogen peroxide, you do not need to rinse. If you used bleach, a light rinse with plain water is fine, but again, do not oversaturate. Work in one direction rather than scrubbing in circles, which can spread contamination to areas you have not treated yet.
Bag the used rags and brush immediately in a sealed plastic bag. Do not leave them sitting in the room.
5. Dry the area thoroughly
This step is more important than the cleaning itself, and most mold guides treat it like an afterthought. If the drywall does not dry completely, the conditions for mold growth are still present. A surface that looks clean but stays damp will show mold again within weeks.
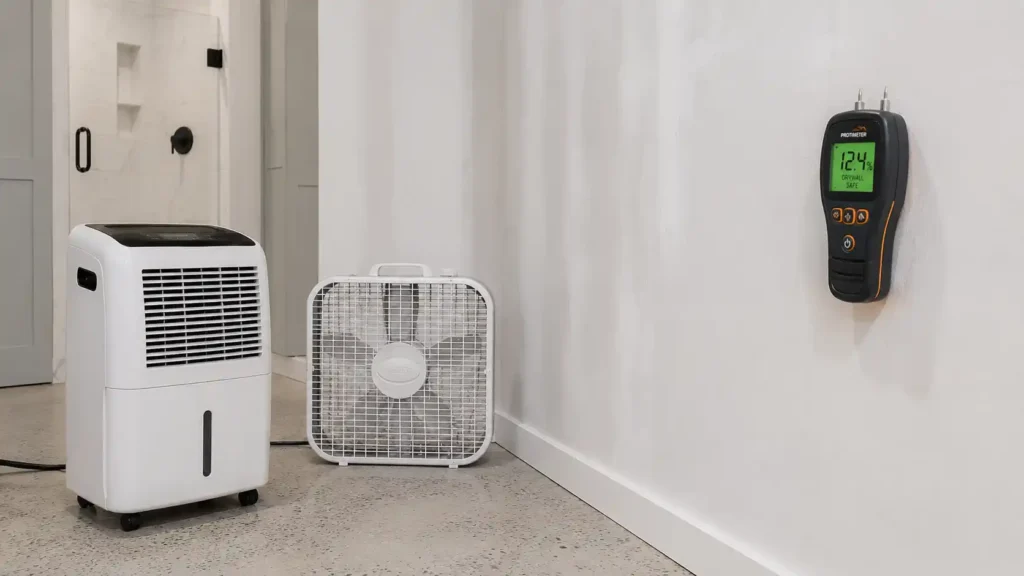
Leave the fan running to exhaust air. If you have a dehumidifier, run it in the room. Leave the area uncovered and unpainted until it is completely dry. Depending on room conditions and how much solution you applied, this can take 24 to 48 hours. Do not rush this.
6. Apply a mold-inhibiting primer before repainting
Once the area is completely dry, do not go straight to paint. Apply a mold-inhibiting primer such as a shellac-based primer or a product specifically labeled for mold resistance. Understanding how many coats of primer new drywall needs can help ensure proper coverage before repainting. These primers seal the surface and provide an additional barrier. Standard paint over bare or treated drywall without primer gives the mold less resistance.
Why the Drying Step Matters More Than the Cleaning
Mold does not grow on surfaces. It grows where there is moisture and an organic material to feed on. Drywall paper provides the food source. Residual moisture after cleaning provides the water. Take away the moisture completely, and you have addressed the growth condition.
To check whether the area is truly dry before priming, press the back of your hand against the surface. It should feel genuinely dry, not just surface-dry. If you have a moisture meter, readings below 15% are generally considered acceptable before painting. For more context, review recommended drywall moisture levels before finishing.
Running a dehumidifier to keep relative humidity in the room below 50% during the drying period helps considerably, especially in basements or bathrooms where ambient humidity tends to stay elevated.
When Cleaning Is Not Enough
Some situations call for removal, not remediation. Here is when to stop and plan for replacement or professional help:
The area is larger than 10 square feet. This is the practical DIY limit. Larger areas carry higher spore loads, increase the risk of spreading contamination, and often indicate a more serious underlying moisture problem.
The mold keeps coming back. If you have cleaned this wall before and the mold returned, there is an active moisture source behind or within the wall. Cleaning the surface repeatedly will not fix a slow leak or chronically humid wall cavity.
The drywall is soft, crumbling, or structurally compromised. Damaged drywall cannot be saved by surface treatment. It has to come out, and the framing behind it needs to be inspected for mold as well before new drywall goes up.
There are signs of moisture behind the wall. Staining that appears from the inside of the wall, efflorescence on a basement wall nearby, or a room that smells musty regardless of cleaning all point toward a moisture source that surface cleaning will not reach.
In any of these situations, the right call is a licensed mold remediation contractor following IICRC professional mold remediation standards. The cost of professional remediation is real, but far less than the cost of repeatedly cleaning a problem that is actually getting worse behind the wall.
Getting the mold off the surface is only part of the job. The other part is making sure the conditions that allowed it to grow in the first place are addressed. Whether that means fixing a slow pipe drip, improving bathroom ventilation, or managing basement humidity, the wall treatment you just did will hold only as long as the moisture problem is resolved.


Elena Hart is the founder and lead writer of Better Home Pro. She writes about drywall, home repair, and practical DIY home improvement topics, focusing on clear, useful information that helps homeowners make better decisions. Her work combines firsthand experience, manufacturer documentation, industry resources, and careful research to create content that is accurate, practical, and easy to understand. Through Better Home Pro, Elena aims to simplify complex home improvement topics and provide guidance that is genuinely helpful to homeowners and DIYers.






No Comments