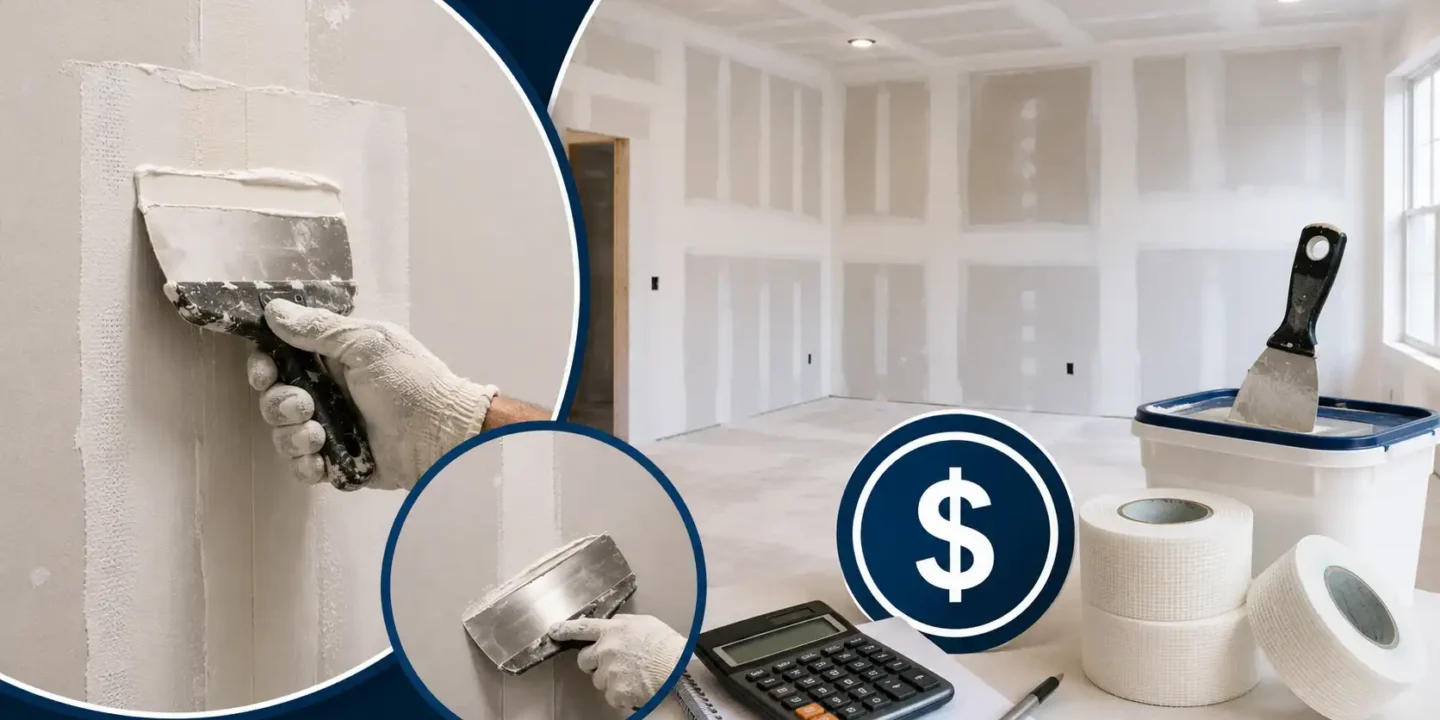



Taping and mudding drywall typically costs between $0.35 and $1.10 per square foot for labor alone, but that range barely tells the full story. The actual price on your quote depends far more on the finish level required, whether the work involves ceilings, how complex the room geometry is, and how much sanding and detail work the job demands. Two contractors can look at the same room and quote very different numbers, not because one is wrong but because they’re pricing different things. Understanding what drives those differences helps you evaluate quotes more accurately and avoid surprises.
Key Takeaways:
- Standard drywall taping and mudding costs $0.35 to $1.10 per square foot, with skilled labor making up the vast majority of the quote.
- Ceilings cost 15% to 30% more to finish than walls because working overhead is physically demanding and catches light imperfections easily.
- Level 4 finish suits flat or eggshell paint, while a Level 5 skim coat costs 20% to 40% more and is necessary for high-gloss paint or sharp lighting.
- Professional mudding requires a multi-day process with at least three separate coats to prevent joint compound from cracking and shrinking.
- Cheap quotes often signal cut corners like rushing the 24-hour drying time between coats or skipping proper dust containment setup.
What “Tape and Mud” Actually Includes
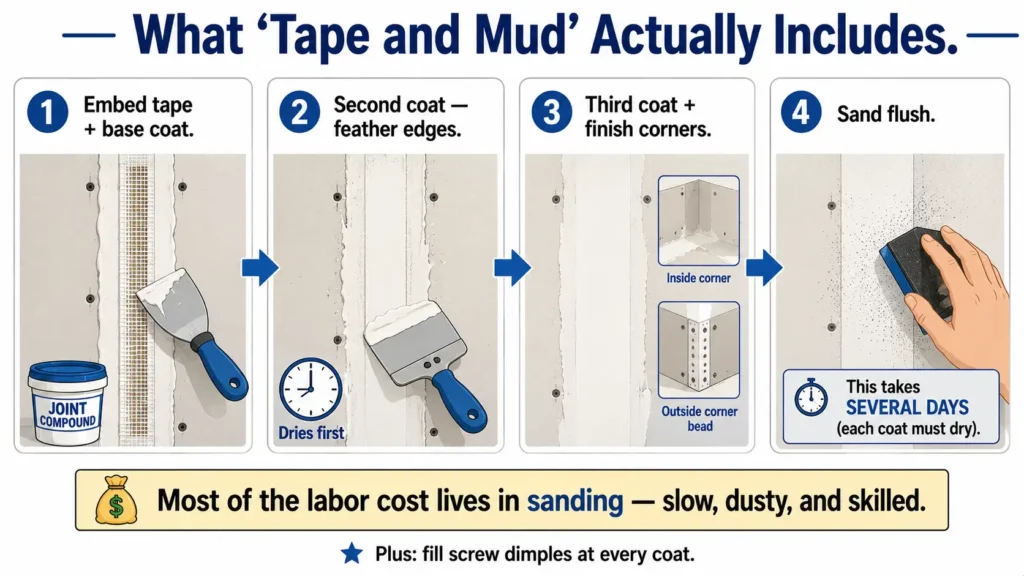
Most homeowners think of taping and mudding as one simple step after the drywall goes up. In practice, it’s a multi-stage finishing process that takes significantly more time than the installation itself.
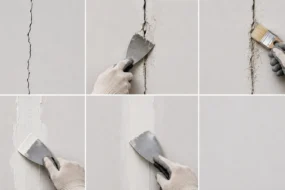
A proper finish starts with taping: embedding paper or mesh tape into the seams between drywall sheets using a base coat of joint compound. After that dries, the finisher applies a second coat of compound to feather drywall seams gradually into the surrounding wall surface. A third coat follows, focused on smoothing everything to a level surface. Each coat has to dry fully before the next one goes on, which means this work stretches over several days even on a straightforward room.
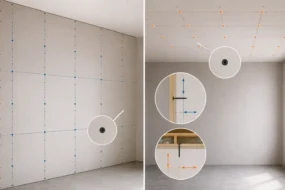
Beyond the flat seams, corners need finishing too. Inside corners get tape folded into them and mudded in multiple passes. Outside corners typically use metal or vinyl corner bead systems that protect exposed edges from cracking and impact damage. Screw dimples across the entire surface get filled at each coat stage.
Once the mud coats are done, sanding brings everything flush. This is where a lot of the labor time actually lives. Good sanding is slow, dusty, and requires careful grit selection to avoid visible sanding scratches or low spots after painting.
The whole process, from first coat to final sanding, is what you’re paying for when a contractor quotes you a taping and finishing job.
Average Cost to Tape and Mud Drywall
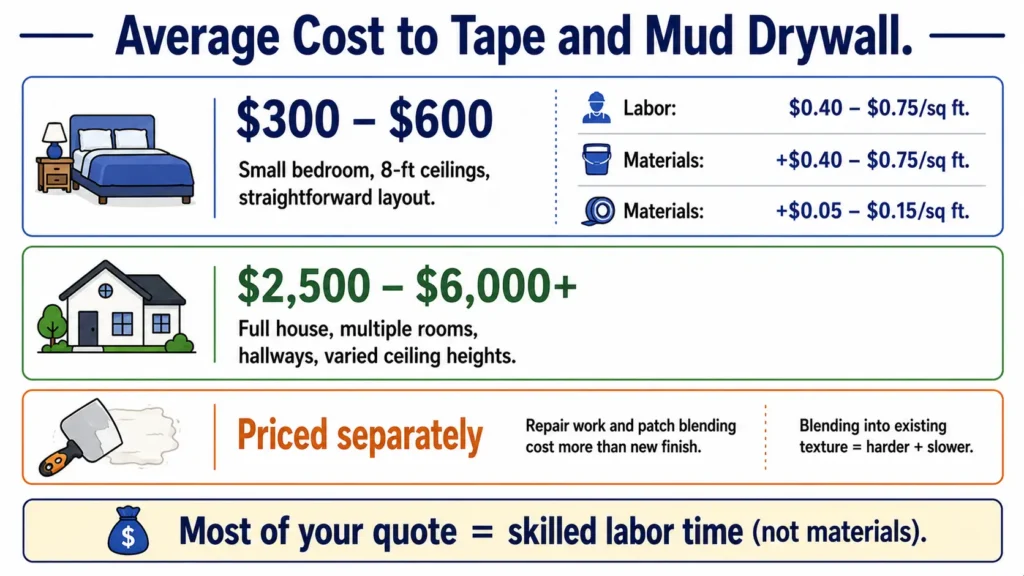
For a straightforward room with standard 8-foot ceilings and no complicated layout, labor rates generally fall between $0.40 and $0.75 per square foot. A small bedroom might run $300 to $600 in labor. A full house with multiple rooms, hallways, and varied ceiling heights can easily reach $2,500 to $6,000 or more depending on scope.
Joint compound, tape, corner bead, and sandpaper add a relatively modest amount on top of labor, usually $0.05 to $0.15 per square foot. Most of the quote is skilled labor time.
Contractors price by the square foot, by the job, or sometimes by the hour depending on how they work and how complicated the project is. Repair work and patch blending are almost always priced separately because matching existing wall texture is far more time-consuming than finishing fresh drywall.
The Biggest Factors That Change the Price
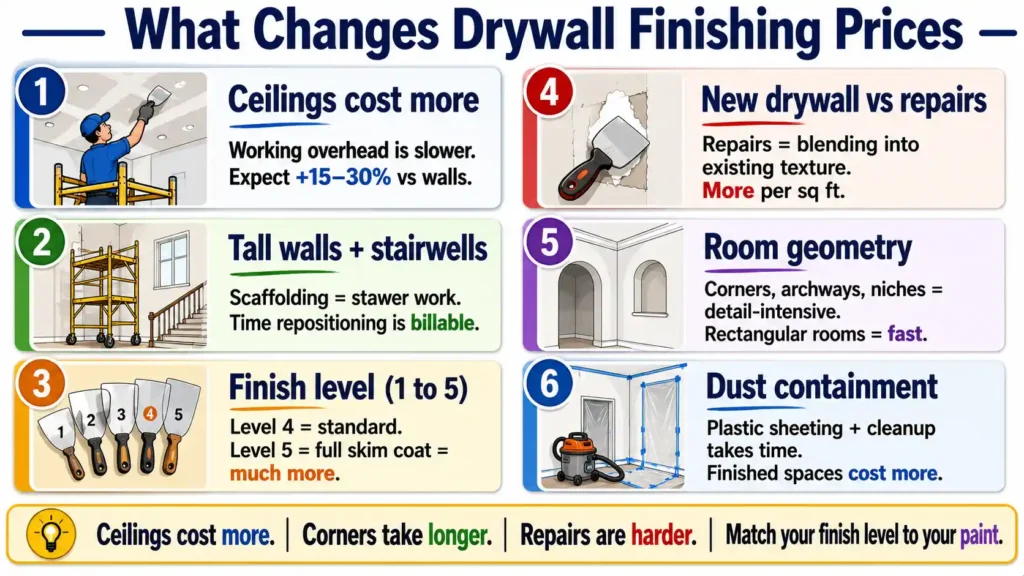
Ceilings cost more than walls. Working overhead is slower, more physically demanding, and leaves less room for error because lighting catches imperfections differently on a horizontal surface. Expect ceiling work to run 15 to 30 percent higher per square foot than comparable wall work on the same job.
Tall walls and stairwells add staging time. Any area that requires setting up scaffolding or a multi-position ladder slows down the work considerably. A finisher spending time repositioning equipment instead of mudding is still on the clock.
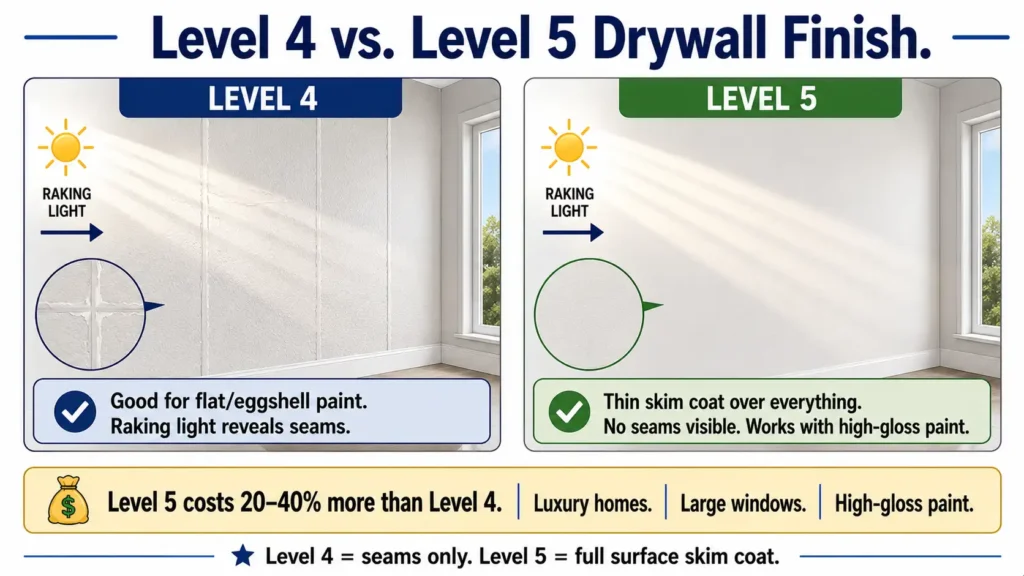
Finish level changes everything. There are five standard levels of drywall finish, from Level 1 (rough tape only, used in hidden spaces) to Level 5 (full skim coat over the entire surface). Most residential work lands at Level 4, which is suitable for flat or eggshell paint. Level 5 costs substantially more because it requires an additional skim coat applied across the entire wall surface, not just the seams. More on this below.
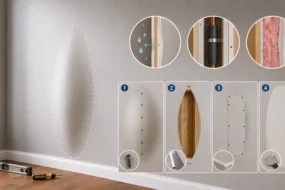
New drywall versus repairs are priced differently. Finishing new drywall is predictable work. Repairing drywall in a lived-in room involves blending into whatever texture already exists on adjacent surfaces, working around furniture, dealing with inconsistent old mud, and matching finish conditions that may not be standard. Most contractors charge more per square foot for repair and patch work.
Room geometry matters. A simple rectangular room with no transitions, soffits, or angles is fast to finish. A room with a lot of inside and outside corners, archways, built-in niches, or irregular ceiling planes takes longer because corner work is detail-intensive.
Texture matching is its own challenge. If you’re adding drywall to a room that already has orange peel, knockdown, or any other applied texture, the finisher needs to match what’s already there. Texture matching requires skill and takes time to get right. Some contractors price this as an add-on rather than folding it into a flat square-foot rate.
Dust containment expectations affect labor. In a gut renovation, dust is expected everywhere. In an occupied home or a partially finished space, proper containment using plastic sheeting, tape, and sometimes negative air pressure takes real setup and breakdown time. If you’re asking for clean work in a finished area, factor that into your budget.
Why Level 5 Finish Costs So Much More
Level 5 is worth understanding in detail because it comes up frequently in higher-end residential projects and causes sticker shock for homeowners who weren’t expecting it.
Standard Level 4 finishing leaves the seams smooth but doesn’t address the slight texture variation between the paper face of the drywall and the mudded seam areas.
Those texture differences become much easier to understand when you see actual before-and-after skim coat results on finished walls.
Under most flat or eggshell paints in normal lighting, you won’t notice it. But under raking light (a single light source hitting the wall at a sharp angle, like a sconce or natural sidelight from a window) those surface inconsistencies become visible. High-gloss paint, semi-gloss, and any kind of dramatic lighting make them worse.
Level 5 addresses this by applying a thin skim coat of compound over the entire wall and ceiling surface, not just the seams. This creates a completely uniform substrate.
Homeowners pursuing ultra-smooth walls sometimes compare Level 5 drywall finishing to veneer plaster systems, since both aim to minimize visible surface imperfections.
It takes longer, uses more material, and requires a finisher with real skill because any trowel marks or inconsistencies in the skim coat become the new surface problem.
Luxury residential projects, rooms with large windows and raking light exposure, and spaces that will get high-gloss paint typically justify Level 5. The cost premium is real, often 20 to 40 percent more than a Level 4 finish on the same space.
DIY vs. Hiring a Professional
Taping and mudding is one of those trades where the gap between amateur and professional results is wider than it looks. The materials are inexpensive and accessible. The technique takes years to develop.
DIY material costs for a standard room run roughly $50 to $150 in joint compound, tape, corner bead, and sandpaper (Product specifications and coverage rates can be verified through USG Sheetrock Products). That’s genuinely low. The challenge is everything else.
Spreading compound looks easier than it is. Getting it flat enough that sanding doesn’t take hours requires experience reading the surface as you work. Drywall Sanding itself generates an enormous amount of fine dust that gets into everything in the home if not properly controlled. And mistakes made at the mud stage (high spots, tool marks, feathering errors) show up vividly after paint goes on, at which point the only fix is going back to sand and re-mud.
DIY finishing makes sense for small repairs, patching a hole or two, or a project where some imperfection is acceptable. For a full room or whole-house finishing job, most people find the time investment and the learning curve don’t pencil out compared to what a competent finisher charges.
Red Flags in Cheap Drywall Finishing Quotes
Price is one thing. But some low quotes reflect corners being cut that you’ll pay for later.
One-coat finishing. Proper finishing requires multiple coats. Any quote that implies the work can be done in a single day on fresh drywall is almost certainly describing a one-coat or thin two-coat process that won’t produce a quality result.
No mention of finish level. If a contractor can’t tell you what level of finish they’re pricing, that’s a problem. The finish level is the most important variable in the entire scope. A quote without a specified finish level is an incomplete quote.
Rushed drying times. Joint compound needs time to dry between coats, typically 24 hours or more depending on humidity and ventilation. Contractors who apply coats in rapid succession end up with mud that looks dry on the outside but is still wet underneath, which causes cracking and shrinkage issues after the job is done.
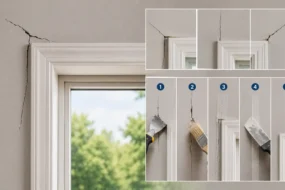
Poor corner finishing. Corners are where cheap work shows up fastest. Outside corners that aren’t properly beaded and mudded start cracking within a year. Inside corners that look good on installation often crack along the tape line if the mud wasn’t applied correctly.
No dust protection discussed. If a contractor never mentions dust containment and your project is in a living area, expect significant cleanup and potential spread of fine drywall dust throughout the home.
Questions to Ask Before You Hire a Drywall Finisher
Before signing a contract or accepting a quote, get clear answers to these:
What finish level is included in this quote? The answer should be a specific level: Level 4 or Level 5 for most residential work. Anything vague should prompt a follow-up.
Is sanding included, and how many coats are you pricing? A three-coat finish with sanding is standard. Some contractors price the finish coats and sanding separately.
Who handles dust containment, and what does it involve? In an occupied or partially furnished home, this matters. Get clarity on what protection they provide and who’s responsible for cleanup.
If there’s existing texture, how do you approach matching it? This is where less experienced finishers get into trouble. Their answer will tell you a lot.
What’s your timeline between coats? A professional finisher will give you a realistic answer based on conditions. Someone rushing through will often give an unrealistically short timeframe.
Getting these answers upfront doesn’t make you a difficult client. It makes you an informed one, and any experienced contractor will respect that.


Elena Hart is the founder and lead writer of Better Home Pro. She writes about drywall, home repair, and practical DIY home improvement topics, focusing on clear, useful information that helps homeowners make better decisions. Her work combines firsthand experience, manufacturer documentation, industry resources, and careful research to create content that is accurate, practical, and easy to understand. Through Better Home Pro, Elena aims to simplify complex home improvement topics and provide guidance that is genuinely helpful to homeowners and DIYers.







No Comments