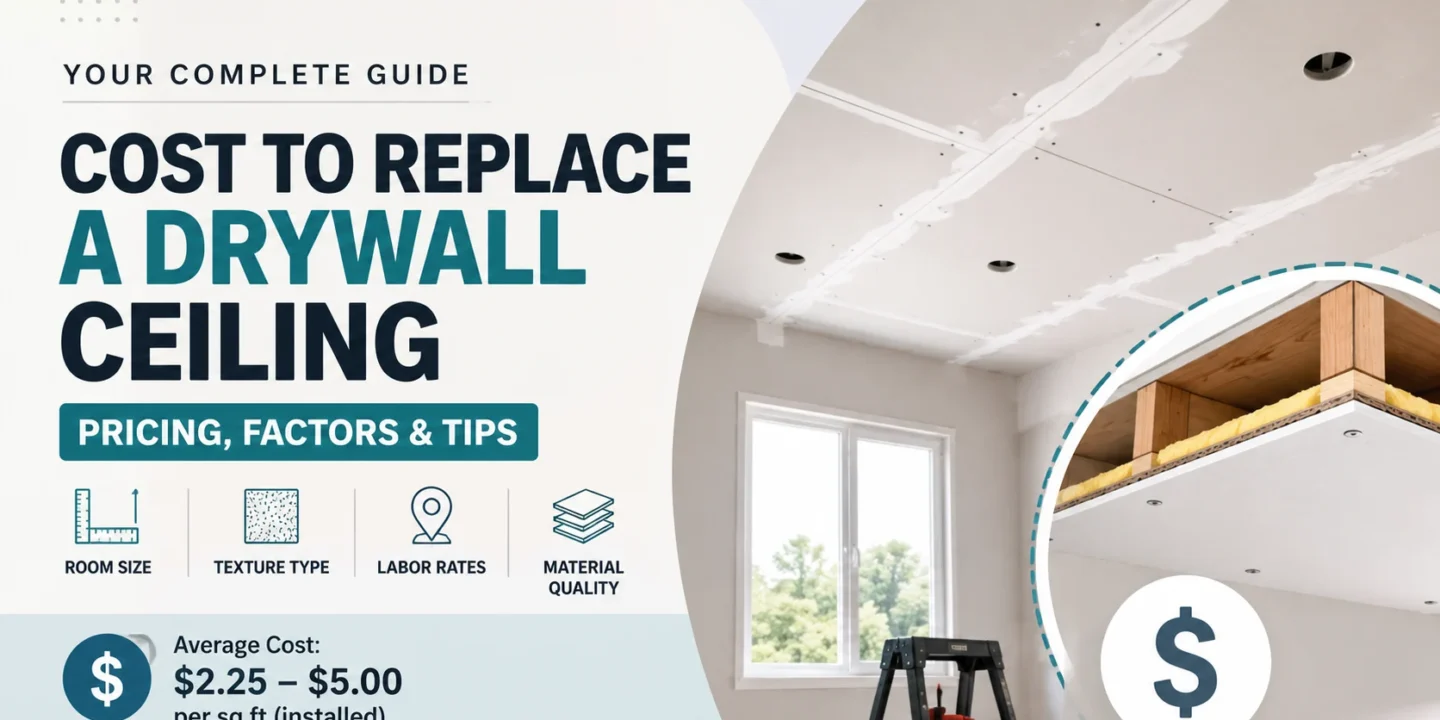

Replacing a drywall ceiling typically costs between $900 and $3,500 for a standard room, with most homeowners landing somewhere in the $1,500 to $2,500 range. On a per-square-foot basis, professional installation generally runs $2 to $5 per square foot for materials and labor combined. The final number depends on room size, ceiling height, whether texture work is involved, and your location. DIY installation cuts out labor costs but comes with real limitations, especially on larger rooms or damaged framing.
If you’re budgeting for a ceiling replacement, the sections below break down exactly what drives the price and what often gets overlooked.
Key Takeaways
- Replacing a drywall ceiling professionally costs between $2.25 and $5.00 per square foot, with most standard rooms averaging $1,500 to $2,500.
- Smooth ceiling finishes require extensive sanding and multiple coats of joint compound, making them more expensive than textured options.
- Vaulted or high ceilings above 9 feet require specialized scaffolding or lifts, which typically increases total labor costs by 30% to 50%.
- Water damage repairs require fixing the underlying leak first, plus an extra $200 to $800 if structural framing or joists need carpentry work.
- Bathrooms and laundry rooms require moisture-resistant green board or mold-resistant drywall, which costs $18 to $25 per sheet.
Average Cost to Replace a Drywall Ceiling
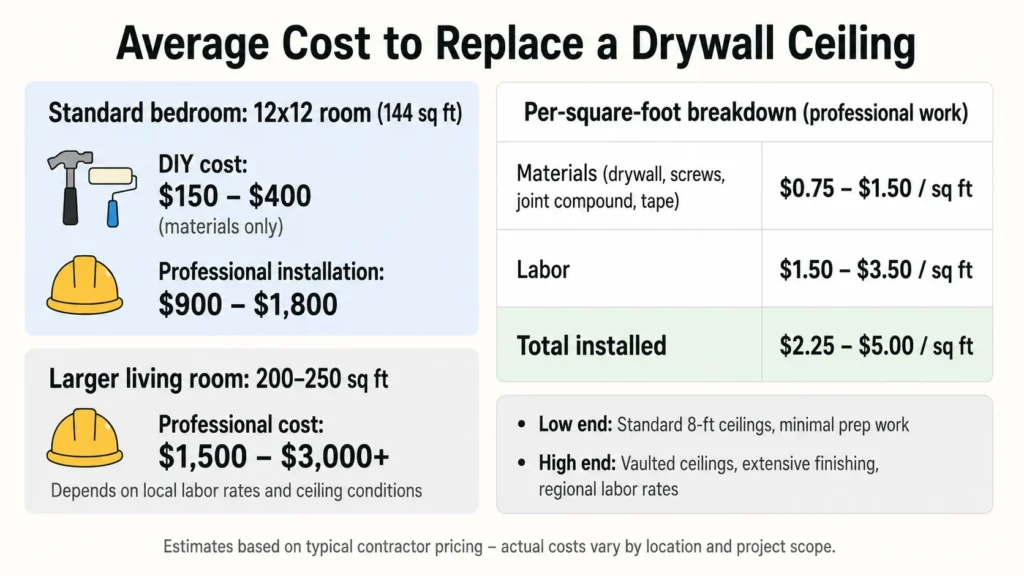
For a standard 12×12 room (roughly 144 square feet), you’re looking at:
- DIY cost: $150 to $400 (materials only)
- Professional installation: $900 to $1,800
A larger living room at 200 to 250 square feet pushes professional costs to $1,500 to $3,000 or higher depending on local labor rates and ceiling conditions.
The per-square-foot breakdown for professional work typically looks like this:
- Materials (drywall, screws, joint compound, tape): $0.75 to $1.50/sq ft
- Labor: $1.50 to $3.50/sq ft — see current drywall hanging labor cost per sheet
- Total installed: $2.25 to $5.00/sq ft
These are realistic estimates based on typical contractor pricing. The low end applies to straightforward rooms with standard 8-foot ceilings and minimal prep work. The high end reflects regional labor markets, vaulted ceilings, or anything requiring extensive finishing.
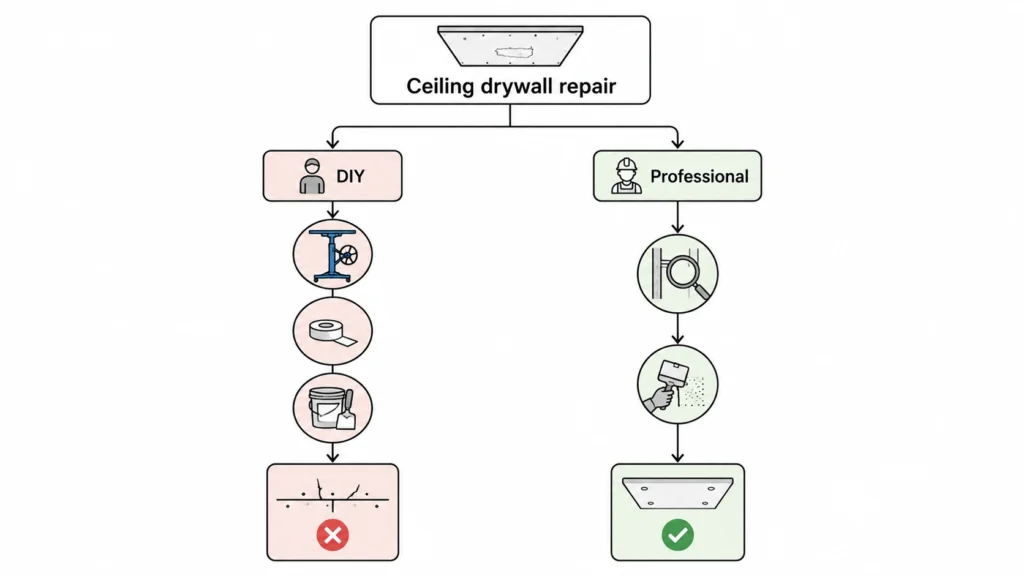
DIY vs. Professional Installation
DIY ceiling drywall replacement is possible, but it’s physically demanding. Hanging drywall overhead requires at least two people, a quality drywall lift or T-bar supports, and a good bit of experience taping and finishing to avoid visible seams. If you’ve never taped drywall joints before, the finishing work is where most DIY projects fall short.
Hiring a professional makes sense when the ceiling is large, when damage extends to the framing or insulation, or when the finished texture needs to match adjacent surfaces. A botched tape job or mismatched texture is expensive to fix after the fact.
Factors That Affect the Cost
Room Size and Ceiling Height
Room size is the most straightforward cost driver. Larger ceilings require more drywall sheets, more joint compound, more labor hours, and often more scaffolding or lift rental. Standard 4×8 sheets cover 32 square feet, so a 200-square-foot ceiling needs at least seven sheets plus waste.
Ceiling height matters just as much. Standard 8-foot ceilings are the easiest to work with. Anything above 9 feet significantly increases labor time because workers need proper scaffolding or lifts, which may need to be rented separately. A 12-foot ceiling in a great room can push total project costs 30 to 50 percent higher than a standard room simply due to access and setup time.
Ceiling Texture Type
Texture choice has a real impact on both labor cost and how much skill is required:
Smooth finish: The most labor-intensive option. Achieving a true flat finish requires multiple thin coats of joint compound, careful sanding between coats, and strong lighting to catch imperfections. Skilled plasterers or finishers charge a premium for smooth work.
Knockdown texture: A popular mid-range option. Applied by spraying or troweling compound and then knocking it down with a knife. Less demanding than smooth but still requires technique to match an existing knockdown pattern. Adds roughly $0.50 to $1.00/sq ft to finishing costs.
Skip trowel or orange peel: Similar to knockdown. Acceptable to most homeowners and easier to blend with surrounding surfaces.
Popcorn/acoustic texture: If your home has an older popcorn ceiling, replacement may require popcorn removal first. That alone runs $1 to $2 per square foot and can add $200 to $600 to a standard room before new drywall even goes up. If the popcorn predates the early 1980s, it may contain asbestos, which requires certified abatement. That’s a separate cost entirely and can run $1,500 to $4,000 or more depending on scope.
The EPA’s official asbestos guidance for homeowners is explicit: if you plan a renovation that will disturb suspect materials, samples must be taken by a trained and accredited professional before work begins, and removal should only be handled by certified abatement contractors.
Labor Rates by Region
Labor costs vary considerably across the country. In high cost-of-living markets like New York City, San Francisco, or Seattle, drywall contractors charge $3.50 to $5.00 per square foot for labor alone. In midwestern or southern markets, $1.50 to $2.50 per square foot is more typical. Rural areas often see lower rates but fewer available contractors, which can limit your options.
Always get at least three quotes from licensed contractors before committing. Pricing varies more than most homeowners expect, even within the same city.
Material Quality
Standard 1/2-inch drywall works for most residential ceilings and costs roughly $12 to $16 per 4×8 sheet. For areas prone to moisture, like bathrooms or laundry rooms, standard panels will sag and degrade over time. Reviewing a detailed green board moisture resistant drywall guide shows why mold-resistant drywall is the better choice for these damp environments, with these specialized products running $18 to $25 per sheet.
Fire-rated Type X drywall, which is 5/8 inch thick, is required in garages and some shared walls in multi-family buildings. It’s heavier to hang (more labor time) and costs slightly more than standard board.
Using the wrong drywall type is a mistake worth avoiding. A contractor who suggests standard drywall for a bathroom ceiling is cutting a corner you’ll regret.

Additional Costs to Consider
Demolition and Debris Disposal
Removing the existing ceiling isn’t free. If you’re replacing rather than just patching, old drywall has to come down, bagged, and hauled away. Demolition and disposal typically adds $200 to $600 to the total, depending on room size and whether the contractor includes it in their quote. Some do, some don’t. Clarify this before signing.
Framing or Structural Repairs
Water damage, which is one of the most common reasons to replace a ceiling, often leaves damaged framing or joist issues behind. Unchecked leaks can also hide structural shifts that cause unsightly cosmetic defects later on, such as drywall ridging where the seams buckle under pressure.
If the structure needs repair before new drywall goes up, that work is billed separately, usually at an hourly carpentry rate of $60 to $100 per hour. Expect to pay $200 to $800 for moderate framing repairs, more for extensive rot or structural issues.
Once repairs are complete, many homeowners opt for a pre-drywall inspection to catch any remaining issues with framing, insulation, electrical, or plumbing before the new ceiling is closed up. This step can prevent expensive callbacks later.
Insulation
If insulation was disturbed, compressed, or contaminated during a leak or ceiling collapse, it may need to be replaced before the new ceiling goes up. Blown-in or batt insulation replacement typically runs $1 to $3 per square foot depending on R-value and type.
Painting
A new drywall ceiling needs primer and at least one coat of paint. If you’re not doing it yourself, painting a ceiling runs $1 to $3 per square foot depending on the finish. This is often the most overlooked line item in a ceiling replacement budget.
Permits
Most simple ceiling replacements don’t require permits. However, if the project involves structural repairs, electrical work, or changes to fire-rated assemblies, a permit may be required. Check with your local building department before starting. Permit fees typically run $100 to $350 depending on your municipality.
Ways to Reduce the Cost
Bundle projects when possible. If you’re already having other drywall work done in the house, a contractor can often add the ceiling to the same job at a lower per-square-foot rate. Mobilization costs are shared across the whole project.
Stick with standard drywall sizes. Ordering 4×8 sheets is straightforward and cost-effective. Some contractors use longer sheets (4×12) to reduce seams, which is better for quality but raises material costs slightly. For small rooms, standard sizes work fine.
Handle demolition yourself. If you’re comfortable pulling down the old drywall yourself and renting a dumpster, you can save the demo portion of the labor cost. Just be sure you know what you’re pulling down and that there are no utilities or structural elements in the ceiling cavity.
Get multiple bids. Pricing varies enough that it’s worth getting three quotes. Don’t automatically choose the cheapest. Look at what’s included, whether they’ll handle permits, and whether disposal is in the price.
Avoid overtime and rush jobs. If the project timeline is flexible, scheduling during a contractor’s slow period can sometimes result in a better rate.
When You Should Hire a Professional
Some ceiling jobs are reasonable DIY projects for experienced homeowners. Many are not. Here’s when professional help is genuinely worth the cost:
Ceilings above 9 feet. Working at height with full drywall sheets is dangerous without proper equipment. Professional crews have the lifts, scaffolding, and physical practice to do this safely and efficiently.
Water damage with unknown cause. If you don’t know where the water came from, replacing the ceiling before finding the source means you’ll be doing it again. A contractor who also identifies the source of the leak saves you money in the long run.
Textured finishes that need to match existing work. Matching an existing knockdown, orange peel, or skip trowel pattern is a skill that takes practice. If the rest of the ceiling or adjacent walls have texture and the new section needs to blend in, this is not the place to experiment.
Asbestos concerns. If your home was built before 1980 and the existing ceiling has popcorn texture, get it tested before disturbing anything. Asbestos abatement requires licensed professionals and specific disposal procedures. There’s no DIY path here.
Large or open-plan rooms. The larger the surface, the harder it is to get clean, invisible seams. A 400-square-foot great room ceiling is a different project than a small bedroom, and the finishing quality difference between a skilled contractor and a capable DIYer becomes much more visible at scale.
Final Thoughts on Budgeting
For a realistic budget, start with your room’s square footage and apply the $2.50 to $4.50 per square foot range for professional installation, then add a buffer of $300 to $500 for prep work, disposal, and painting. If texture matching or moisture-resistant materials are involved, adjust upward.
Get itemized quotes that separate labor, materials, disposal, and finishing so you can compare them accurately. A contractor who bundles everything into a single number is harder to evaluate than one who gives you a clear line-item breakdown.
The goal isn’t just a new ceiling. It’s a ceiling that lasts, blends with the rest of the room, and doesn’t need to be redone in two years because the underlying problem wasn’t addressed.

Elena Hart is an interior writer and decorator who knows how to make a home look great on any budget. She has spent the last 10 years helping people turn complicated design trends into easy DIY projects. Her writing has been featured in big lifestyle magazines. When she isn't writing, Elena is busy working on her own mid-century modern house, hunting for thrifted gems and testing out bold wallpapers.


No Comments