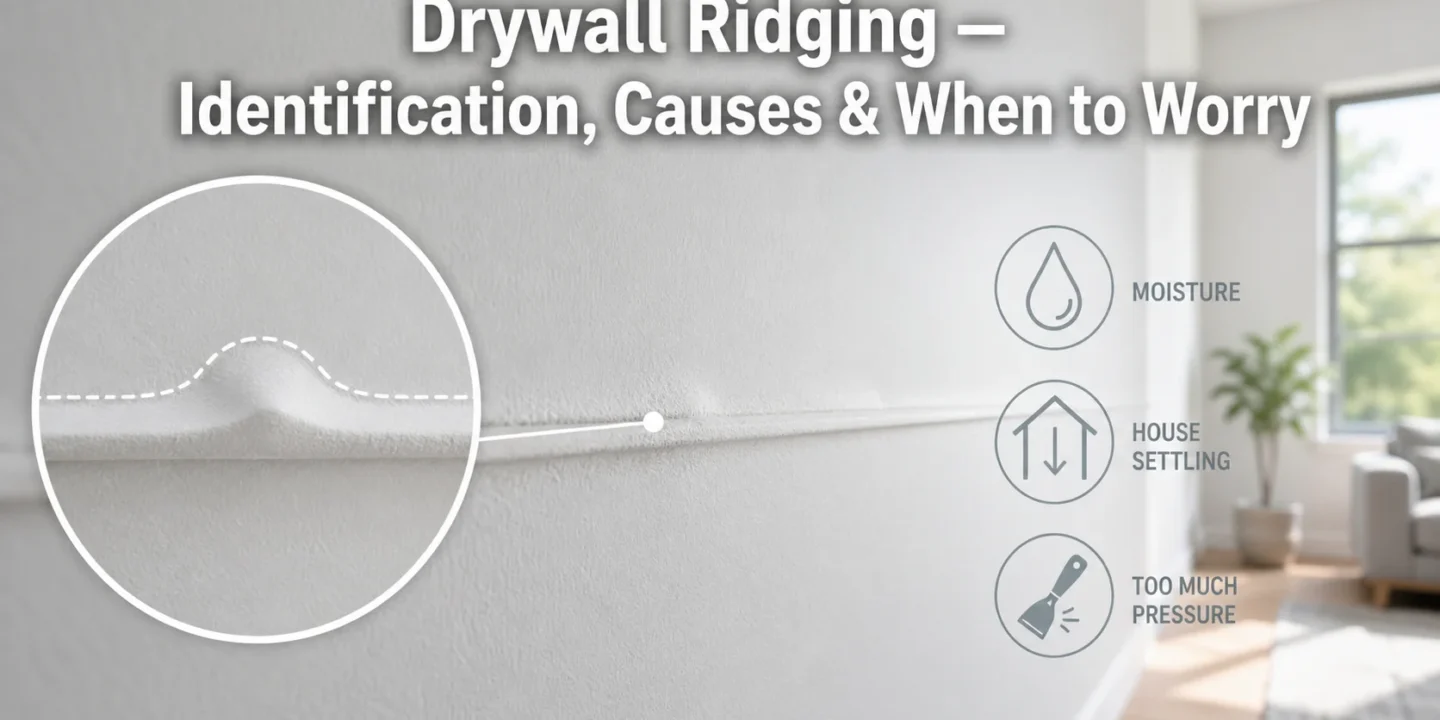

Drywall ridging refers to visible raised lines or long bumps that appear on finished walls or ceilings. These ridges often follow drywall seams, framing members, or fastener lines and may become more noticeable under certain lighting conditions.
This is not a finishing issue like minor uneven texture. Ridging is a specific symptom — and understanding whether it’s cosmetic or structural is key.
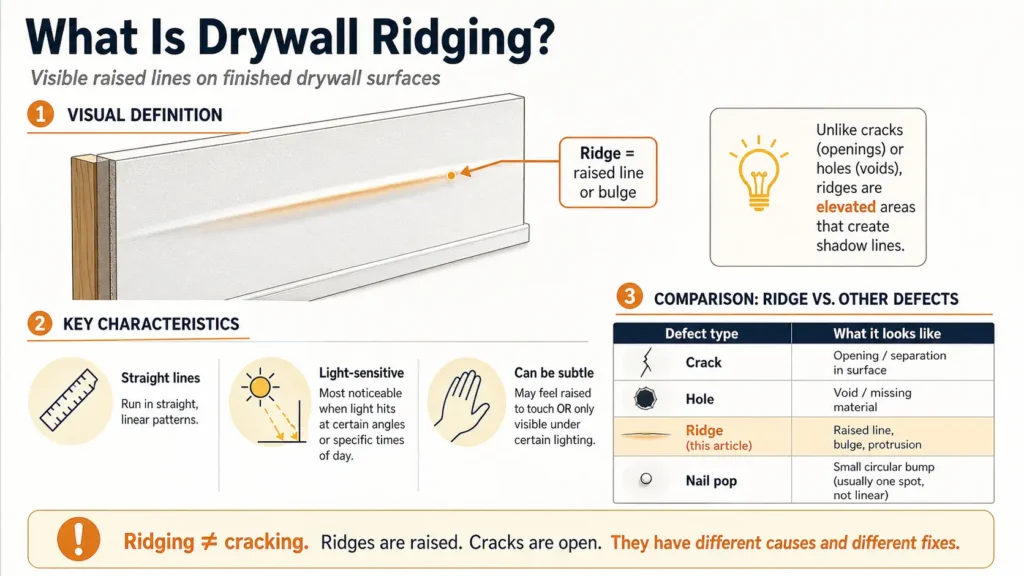
What Is Drywall Ridging?
Drywall ridging is a linear elevation or hump that forms along:
- Seams between drywall sheets
- Stud or joist lines
- Fastener rows (screws or nails)
- Ceiling framing members
Unlike simple joint imperfections, ridges typically:
- Run in straight, continuous lines
- Follow framing layout patterns
- Become more visible in side lighting (called raking light)
- Sometimes change with seasons
Key Takeaways
- Drywall ridging refers to visible raised lines or bulges on finished surfaces, often noticeable only in raking light, and is distinct from cracks or holes—it’s an elevation change that creates shadows.
- The most common causes include lumber shrinkage pushing fasteners outward, bowed framing members, truss uplift in ceilings, improper fastener depth, excessive joint compound, and environmental factors like moisture or temperature swings.
- Cosmetic ridging is uniform, stable over time, lacks cracks, and aligns with known framing or seams, while structural ridging worsens progressively, appears with cracks, affects doors/windows, or shows exterior signs like foundation issues.
- Call a professional if ridging develops suddenly, exceeds 1/4 inch in height, comes with malfunctioning doors/windows or water damage, or shows irregular crack patterns—otherwise, stable cosmetic ridges can often be addressed with skim coating or sanding.
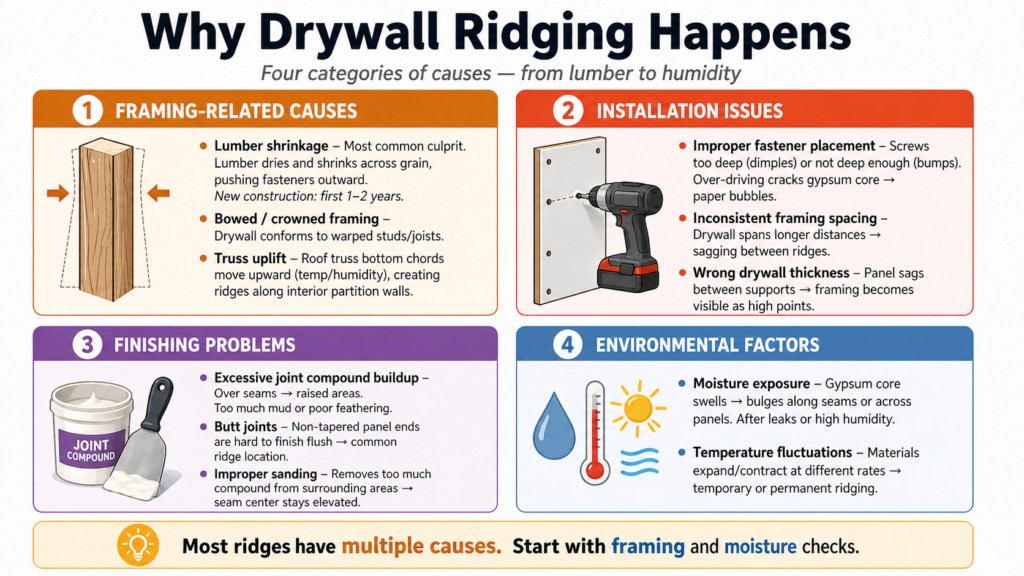
Why Drywall Ridging Happens
Framing-Related Causes
Lumber shrinkage is the most common culprit behind drywall ridging. As structural lumber dries and seasons after installation, it shrinks across the grain — in fact, according to Oklahoma State University Extension, there is approximately a 1% change in wood dimensions per 4% change in moisture content — a significant shift for freshly framed construction. This shrinkage can push fasteners outward, creating visible lines along studs or joists. New construction is particularly susceptible during the first 1–2 years.
Bowed or crowned framing members create ridges when drywall is forced to conform to the warping of studs or ceiling joists. Even slight variations in lumber straightness translate to visible surface irregularities.
Truss uplift in ceiling drywall occurs when the bottom chords of roof trusses move upward due to changes in temperature and humidity. Building Science Corporation’s research on truss uplift and its effect on drywall explains that this seasonal movement is virtually unavoidable in insulated roof systems and creates ridges along interior partition walls where the ceiling meets the wall.
Installation Issues
Improper fastener placement causes ridging when screws or nails are driven too deep, creating dimples, or not deep enough, leaving bumps. According to the industry fastener installation standards (GA-216) set by the Gypsum Association, screws should be driven so that the head sits slightly below the panel surface without breaking the face paper or fracturing the gypsum core — a precise depth that directly prevents surface ridging and nail pops. Over-driven fasteners can also crack the gypsum core, causing paper to bubble.
Inconsistent framing spacing forces drywall to span longer distances in some areas, creating sagging between ridges at the framing members.
Using incorrect drywall thickness for the framing spacing allows the panels to sag between supports, making the framing locations visible as comparative high points.
Finishing Problems
Excessive joint compound buildup over seams creates raised areas that appear as ridges. This happens when tapers apply too much mud or fail to feather the edges properly.
Butt joints (where non-tapered panel ends meet) are inherently difficult to finish flush and commonly create slight ridges even with proper technique.
Improper sanding can create ridges by removing too much compound from surrounding areas while leaving the seam center elevated.
Environmental Factors
Moisture exposure causes the gypsum core to swell, creating bulges along seams or across entire panels. This often appears after water leaks or in high-humidity areas.
Temperature fluctuations cause materials to expand and contract at different rates, potentially creating temporary or permanent ridging.
How to Identify Whether Ridging Is Cosmetic or Structural
Cosmetic Ridging Indicators
Appearance characteristics:
- Ridge is uniform along its length.
- No accompanying cracks or separation
- Only visible in raking light (light hitting the wall at a shallow angle)
- Feels slightly raised, but surface texture is intact.
- Appears in predictable locations (over seams or framing members)
Common cosmetic patterns:
- Ridges that correspond exactly with known framing locations
- Symmetrical lines running parallel to each other
- Minor bulging at the butt joints
- Slight variations in wall flatness without cracking
Testing methods:
- Run your hand along the ridge—cosmetic issues feel smooth with only subtle elevation changes.
- Check if the ridge appears and disappears as the lighting changes throughout the day.
- Look for corresponding issues on the opposite side of the wall (absence suggests a cosmetic-only problem)
Structural Ridging Warning Signs
Critical indicators requiring professional evaluation:
Progressive changes: Ridges that worsen over time, become more pronounced, or develop cracks indicate ongoing structural movement.
Accompanied by cracks: Ridging with parallel cracks running along the ridge line, or perpendicular cracks extending from the ridge, suggests framing stress or failure. InterNACHI’s guidance on when to recommend a structural engineer vs. a contractor notes that improperly altered roof trusses or engineered lumber always warrant a licensed structural engineer — not just a general contractor — for evaluation.
Doors and windows affected: Nearby doors that stick, won’t latch, or show gaps; windows that become difficult to operate or show gaps in the frame.
Floor changes: Ridges in walls that correspond with sloping, bouncing, or sagging floors below or above.
Multiple intersecting ridges: When ridges form patterns that don’t align with expected framing locations, especially if they intersect or form irregular patterns.
Nail pops in clusters: Multiple fasteners popping along the same ridge line indicate significant framing movement.
Separation at corners: Gaps developing where walls meet ceilings or other walls, often accompanied by ridging.
Exterior signs: Corresponding problems visible from outside the home—foundation cracks, leaning walls, or roofline irregularities.

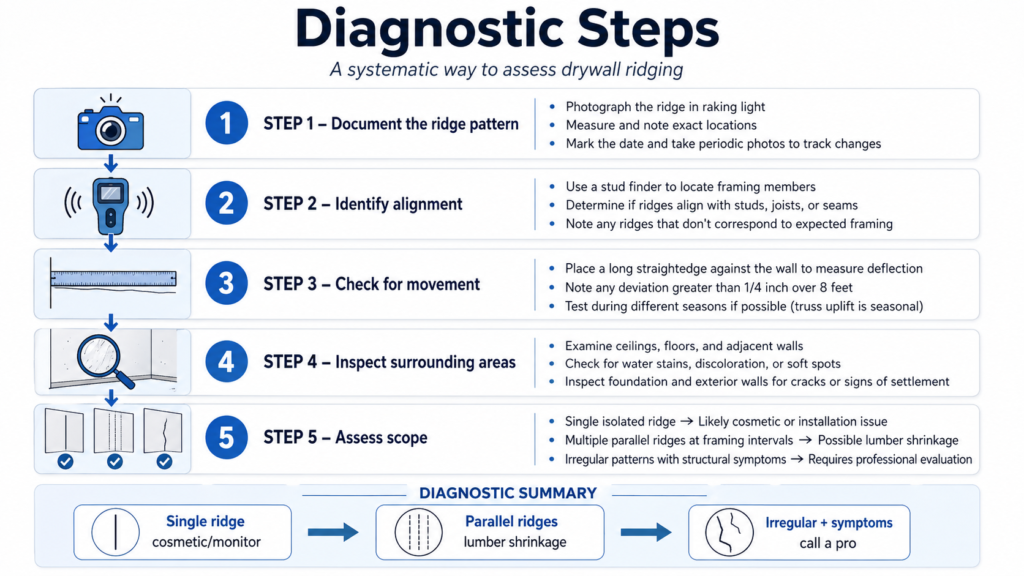
Diagnostic Steps
Step 1: Document the ridge pattern
- Photograph the ridge in raking light.
- Measure and note exact locations.
- Mark the date and take periodic photos to track changes
Step 2: Identify alignment
- Use a stud finder to locate framing members.
- Determine if ridges align with studs, joists, or seams.
- Note any ridges that don’t correspond to the expected framing.
Step 3: Check for movement
- Place a long straightedge against the wall to measure deflection.
- Note any deviation greater than 1/4 inch over 8 feet.
- Test during different seasons if possible (truss uplift is seasonal)
Step 4: Inspect surrounding areas
- Examine ceilings, floors, and adjacent walls.
- Check for water stains, discoloration, or soft spots.
- Inspect the foundation and exterior walls for cracks or signs of settlement.
Step 5: Assess scope
- Single isolated ridge = likely cosmetic or installation issue
- Multiple parallel ridges at framing intervals = possible lumber shrinkage
- Irregular patterns with structural symptoms require a professional evaluation.
When to Call a Professional
Contact a structural engineer or qualified building inspector if you observe:
- Ridging that develops suddenly or worsens noticeably over weeks or months.
- Ridges are accompanied by multiple cracks, especially diagonal or stair-stepped patterns.
- Any ridge measuring more than 1/4 inch in height.
- Ridges associated with doors or windows are malfunctioning.
- Water damage or moisture problems in the same area
- Ridges in newer construction that appear after the first year
- Any situation where you’re uncertain about safety
A cosmetic ridge that’s been stable for years with no accompanying symptoms rarely requires structural intervention, but when in doubt, professional assessment provides peace of mind and prevents minor issues from becoming major problems.
Next Steps for Cosmetic Ridging
If you’ve determined your ridging is cosmetic, solutions typically involve:
- Skim coating to level the surface is the most effective cosmetic solution for stable drywall ridging. If you’re wondering how much difference this actually makes visually, these before-and-after examples show how skim coating can eliminate visible ridges, seams, and uneven wall surfaces.
- Strategic sanding and refinishing
- In severe cases, removing and replacing drywall sections
- Addressing humidity or installation issues to prevent recurrence
Understanding whether your drywall ridging is a simple aesthetic flaw or a symptom of structural movement is essential for an appropriate response and budgeting for repairs.

Elena Hart is the founder and lead writer of Better Home Pro. She writes about drywall, home repair, and practical DIY home improvement topics, focusing on clear, useful information that helps homeowners make better decisions. Her work combines firsthand experience, manufacturer documentation, industry resources, and careful research to create content that is accurate, practical, and easy to understand. Through Better Home Pro, Elena aims to simplify complex home improvement topics and provide guidance that is genuinely helpful to homeowners and DIYers.


No Comments